Thursday, June 27, 2013

Really Reasonable Ribbon and Gecko Galz Vintage Shabby Chic Bookmark

Hello Peeps!!
Happy Thursday!!
Today I would like to share with you a bookmark that I made for myself.  I am a big fan of reading during the summer.  Normally I just use a grocery receipt for a book mark...but  I thought I would make myself a nice flat book mark for the summer.
I used some fabulous ribbons and trims from Really Reasonable Ribbon!  My favorite Juliet Lace has been tucked in at the top and bottom of my bookmark. I used the Pink Twill Chevron behind my old book sheet layer, I did slightly ink it with Ranger's Vintage photo.  I used the Aqua Floral Satin ribbon (which I inked with vintage photo) under my floral paper, over my floral layer and to create a cute little flat bow across the top.
Here is a close up of the chevron ribbon and the aqua floral ribbon.  The Butterfly images (Papillion Jewel it set), floral paper, and aqua paper (Wild Roses Paper pac) are digital images from Gecko Galz.
Here is a close up of the Aqua satin bow and Juliet lace.  I used a button from the Vacation Totes collection from Really Reasonable Ribbon.
Close up of the bottom.  I love how the inked Aqua Satin ribbon turned out.  I adhered all my layers and ribbon with 1/4" Scor Tape which you can find at Really Reasonable Ribbon.  
One last look at the finished bookmark.
I applied the Gecko Galz aqua digital paper to a scrap piece of a manila folder using scor tape (so it would have some weight to it).  Cut it to the size I wanted, punched the top with a Martha Stewart Lace punch.  Inked it with Ranger's Vintage photo.  I cut the floral digital paper piece .5" inches narrower and 1" shorter than the background piece.  Used the score tape to adhere the aqua ribbon across the center of the bookmark.  Next was the floral paper, then pink chevron ribbon, scrap piece of book paper, more aqua ribbon and finally butterfly images.  Pretty easy peasy!
I hope you have a great day and have some time to read a great book!
Thank you for visiting!!
Hugs
Heather

Wednesday, June 19, 2013

Butterflies and Nature Embossed Background

Hello Friends!!
Happy Wednesday!!
Super excited to be sharing with you my Second Design Team Project for 
Globecraft and Piccolo!

I hope you enjoy the sneak peek!!
You can see the whole project and tutorial for my page at the GlobeCraft and Piccolo blog.

Just so you know they have a new UV Resin, which I am waiting to receive...so I can play with it.  It looks like super fun!  Here is a link to what you can do with it on Youtube.

Thank you for visiting!!
Hugs
Heather

Tuesday, June 18, 2013

Pirate Booty Holder

LOL...I bet that got your attention..."Booty holder"...I am sure you thought maybe I was hacked....lol...well...

Happy Tuesday!!

Heather here and today I would like to share with you a graduation money holder card that I made for a very Special Graduate!  Here is a look at the finished money holder (what graduate couldn't use a little money)?
Pin It!
I used a piece of black vintage colorcore cardstock for the base of my money holder.  You will need to cut a 12 " piece of cardstock to measure 7" by 12".   You will score at 1", then 4", 6.5", and 9".  Please refer to photo below for how to do the folds. 
Step Two
Flip over your base, and apply score tape along the edge of the fold. Please refer to photo below. You will also see some score lines in the center of the 3rd and 4th areas (from the left).  This will be cut out later.
Step Three
Remove the paper from the adhesive, and adhere the one side to the other side, please refer to photo below.
Step Four
Now you will need to cut down about 1 inch into this fold leaving a little more than 0.25" on either side (this area is the one I scored and mentioned above).  This is where you will be placing your money.  It is supposed to be a tennis net...clever if I do say so myself (this will make more since later).  
Step Five
I cut out 6 pieces of cardstock in our High School Colors.  The larger white pieces measure 6.75" by 3.75" and the red ones measure 6.5" by 3.5".  The thin white piece measures 6.75" by .75", and the red one is 6.5" by .5".
Steps Six & Seven (lol)
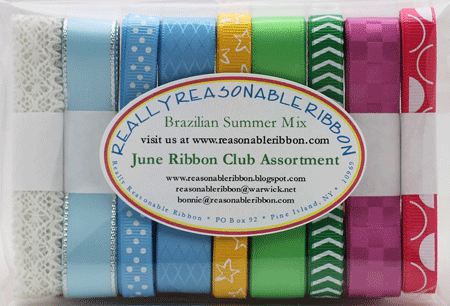
I distressed all my edges with a pair of scissors, then inked the edges with Ranger's Vintage Photo, then ran the red pieces of card stock through my Big shot expression with the Haunted Damask Cuttlebug  embossing folder.  Our High School has a Pirate as it's logo so this embossing folder has skulls, spiders and bats...which is cool..and works for a Pirate theme.  I used the Bright Red Seam binding from Really Reasonable Ribbon (inked it with Ranger's vintage photo distress ink) for my tie closure for my card.  Please refer to photo below for placement.  I used the scor tape to adhere my layers together and to the base of my card.
Step Eight
Apply the score tape to the sections shown in the photo below.  I added some money to the card so you get an idea of what it will look like.
Step Nine
Flip the money holder part up and apply the scor tape to the lower section like you did above.
Step Ten
Remove the paper layer of scor tape and apply the black netting (here is where the tennis net idea comes in to play).  I cut off the extra netting at the edges, then applied some more scor tape to both sides of the part that actually holds the money.  Please refer to photo below for placement (do both sides..only one side shown below).
Step Eleven
Remove protective paper layer of scor tape and add the netting across the bottom of both sides, this forms the "tennis net."  Next I used the Black with White Skulls ribbon from 
Really Reasonable Ribbon as the end caps for my net. I just added an extra piece of scor tape to the bottom areas that were covered with the netting (so that is 4 tiny pieces, 2 on each side).  The tops of the ends were not covered with anything, the netting doesn't go that high.  I used GIMP and Inscape (both free programs) to create my awesome lettering!!  All lettering and Images were inked with Ranger's Vintage photo distress ink..to give them an aged look.
Step 12
I also used GIMP and Inkscape to create some fabby Pirate Tennis images...so fun!!  I used glue to adhere all my words and images to the netting and cardstock (since they were bumpy or embossed).
One last look at the front 
This is one of those tutorial where you could use the basics and design your own money holder...shabby chic, clean and simple...or my fave Vintage!  
I hope that you have enjoyed my tutorial, and if you create a money holder of your own...I would love to see it!!
Thank you for visiting!!
Hugs!!
Heather


Sunday, June 16, 2013

Art Glitter & Authentique Important Dates Keeper

Hello Peeps!!
Happy Father's Day to all the dads out there!
I have another tutorial for you today using Art Glitter and Authentique Paper. 
Art Glitter has joined up with Authentique Paper for the month of June.  You will want to make sure you hop on over to the 
Art Glitter Blog because if you leave a comment on my post you can be entered for a chance to win a prizesee my creation and the tutorial!
Here is a sneak peek.

Hope you enjoy the tutorial!
Thank you for visiting!!
Hugs
Heather

Thursday, June 13, 2013

June Really Reasonable Ribbon Blog Hop


RRRBlogHop[1].jpg
Hello Friends!!
I am so excited to be participating in the
Hopefully you are visiting me from Cherry's Blog.
If you are just joining the blog hop, then you will want to start at the 
Really Reasonable Ribbon Blog.
That way you can see what you can win, and not miss out on any of the Design Team's fabulous creations using this month's
Really Reasonable Ribbon Assortment!!
Here is a photo of the Ribbon Assortment below!! 
Monthly Ribbon Club, Domestic
What a LOVELY Summer Mix!!  I love all the summery colors in this month's kit. 
I thought I would make a card for my bestie Ginny, she has been working so hard the past couple weeks getting things ready for her son's Eagle Scout Court of Honor and his Graduation Party that took place this past weekend.  Let me just say that EVERYTHING was perfect!!!  Everything she does is just wonderful, and I thought I would take this opportunity to let her know just how awesome she is (I did make this card before I ate the delicious oatmeal with lemon frosting in the middle cookies she made me).  Of course I am doing it in my own humorous way...otherwise she would think I was foney balony (I could of spelled that right...but it didn't look as good).  BTW...Ginny and I are Vegan...and she did give me my first bite of foney Bolony...it was tasty.
Here is my card.
Pin It!
  The darling little image is from the 
Stitch in Time Ephemera collection from Gecko Galz.
 I simply added the text using the program GIMP.  I couldn't pass up the "Jelly," "SEW" and the "Keep Calm and Stitch on!"  Ginny has used the "Keep Calm" phrase in many ways lately...(here she thought I didn't listen...lol...my brain is like a sponge...then again so is my belly).  I inked all the edges with Ranger's Vintage Photo distress inks. 
I used the green and white chevron, yellow stars, white crochet lace and blue diamond ribbons from Bonnies Brazilian Summer Mix Assortment!!   I also used scor tape and candi fix it foam pads to adhere my layers and ribbons.  The fix it foam pads elevate my sweet little image.   I am a little bummed because I embossed my yellow paper, it just doesn't want to show up in the photos (you can see it in the one below though).
I also used two buttons from the  Button Totes Vacation, and tied bows from both lemon and green apple baker's twine from
 Really Reasonable Ribbon.  
I just love this month's ribbon assortment, and enjoyed working with it!!  Actually...I like all the ribbons and trims at Really Reasonable Ribbon, so don't just get the assortment...lol...treat yourself to more goodies...just tell your spouses etc...that "Heather said it was okay"....I like getting thrown under the bus once in a while...keeps me on my toes!!  If they give you a really hard time...then tell them you are getting goodies for your awesome best friend for their bday (as if they will know when that is...lol).

 I hope that you have been inspired to create some fabulous projects and do a little shopping and maybe get into a little harmless trouble...and remember you can always join us at the Ribbons Anonymous group...if you get caught...and we will hash out a better plan for next month. 

**Next stop on the Hop**
Time to hop on over to Tammy's blog,
 see what she has created, and leave her a little love.


I will be sharing with the following places
Brag Monday at The Graphics Fairy
Make it Monday:  Anything Goes

Thank you for visiting!
Hugs!!
Heather

Thursday, June 06, 2013

Sympathy Card

Hello Friends!!
Happy Thursday!!
Today I would like to share a Sympathy card that I was asked to make.  I have such a hard time with sympathy cards...what is the right thing to say..what kind of image to use etc.  So I thought I would just stick to my normal style (not to many poofy embellishments..so it would fit in an envelope).  I decided to stick to a simple sentiment as well.
The rose image is from the Graphic's Fairy, the patterned papers are digital papers from Gecko Galz.  
I used these fabby ribbons and trims from
Really Reasonable Ribbon.
Danielle White Crochet lace, Moss green leaves, aqua baker's twine, Pink Salmon seam bindingmarshmallow candies, candies fix it foam padsNatural Crochet lace and scor tape.
Above is a close up of my sweet little seam binding bow, want to make one??.... you can see my BFF Ginny's tutorial here.  I also have the rose image elevated with the candi fix it foam pads, so that I could put the Danielle lace underneath it.
I inked all my edges with Ranger's Vintage photo.  I inked the marshmallow candies as well, and elevated them with the candi fix it foam pads!
Above you can see the Danielle crochet lace, the aqua baker's twine and my fav moss green leaves!  I also tucked in some 
Natural Crochet lace at the top and bottom of my rose image.
On the inside I added the sentiment..."Our thoughts and prayers are with you."  Of course I forgot a photo of the inside...LOL.
One last look at the whole card.
Here is a peek of the project that I posted yesterday...for Globecraft &Picola I used my favorite Moss green leavesDanielle White Crochet lace, aqua baker's twine, Pink Salmon seam bindingcandies fix it foam pads, light blue crochet lace, orange swirls ribbon and orange buttons from Really Reasonable Ribbon. I am sporting my new Orange sunglasses :0)  Lately I have been having a flashback to the 70's when Orange was my favorite color (all started when my best online buddie Carol's dd wore a fabby orange dress to Prom.
I hope that you are having a great day!!  Check out the great 
ribbon assortment Brazilian Summer Mix that Bonnie has for June...wonderful colors for Spring/Summer!
Monthly Ribbon Club, Domestic
Thank you for visiting!!
Hugs
Heather

Wednesday, June 05, 2013

Sneak Peek of GlobeCraft & Piccola DT Project

Hello Friends!!
Happy Wednesday!!
Super excited to be sharing with you my first Design Team Project for 
They have wonderful embossing powders and charms....all kinds of goodies for you to check out!
So please stop by the Globecraft &Piccola Blog to see my tutorial
on how to create your own background paper using embossing powders.
Thank you for visiting!!
Hugs!!
Heather


Saturday, June 01, 2013

Gecko Galz & Really Reasonable Ribbon Masculine Card

Hello Friends!!
Happy Saturday!!
Happy June!!
It is the beginning of the month, so you know that there are a lot of new items for you to check out at Gecko Galz and 
Really Reasonable Ribbon.  It is also the start of a new "Masculine and Ribbon Challenge" at Really Reasonable Ribbon.
Here is a card that I made using a new digital stamp and digital papers from Gecko Galz.  It is a masculine card, which I embellished with goodies from Really Reasonable Ribbon.  
Pin It!
The card base was made with the "Dapper Dan" digital paper pack.
The train is from the "Gentlemen's club" Digital stamp set.
I used Gecko Galz "Start your Engines" collage sheet for my main image, I matted it with the "Gatsby" Digital Paper.  I also outlined my images with Art Glitter Designer dries clear Glue with the Ultra fine Metal Tip and applied #188 Black Vinyl glitter.  
One last look at the whole card.
Don't forget to link up to the 
at Really Reasonable Ribbon!
Thank you for visiting!!
Hugs
Heather