Tuesday, October 15, 2013

Autumn Leaves Challenge and Collage Sheet

Hello Friends!!
Happy Tuesday!!
Today is the 15th, and you know what that means!
Time for a new Challenge at Really Reasonable Ribbon!
Our theme for this challenge is Autumn Leaves & Ribbon.
Here is my creation below.
Pin It!
It is a card, which can be used as a frame, with a removable tag of course :0)
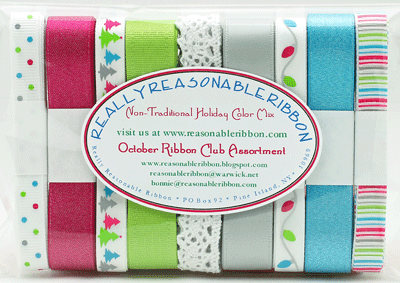
I used some goodies from Really Reasonable Ribbon to dress up my piece!
My sentiment is "When the Season is Thanksgiving and Autumn's in the air.....It warms the heart to think of those For whom we specially care.
Here you will see I used some of my favorite Brown Sugar Baker's Twine and Wine Grosgrain as well as the items I already mentioned above. I used my Art Glitter Designer dries clear Glue &
Ultra fine Metal Tip to apply glue drops to my piece, then added #196 Lion's Mane glitter!  I also used my Perfect Layers Ruler to create my tag below.   Below is my tag which comes out.
I kept it simple with the Juliet Lace, and the Seam binding bow.
I did create a collage sheet for my creation!
I used images from Karen the Graphics Fairy.
You will notice that after I did my first card and tag, I decided to go ahead and create a digital tag base for the card, instead of you having to get additional paper.  I also included another tag on the card (Darker one) with the same sentiment and some pumpkins.  There are a couple extra pumpkins for a Clean and Simple card!

You can purchase it in my Etsy here.

***How would you like a chance to win my Collage Sheet??
Simple enough, just leave a comment below
 and I will do a Random Draw and announce it next week.***

I have done a tutorial for the card, and it will be with my next 
RRR post.

I can't wait to see what you create for our 
Really Reasonable Ribbon Challenge
Autumn Leaves and Ribbon!!

I will be playing along with the following challenges
The Shabby Tea Room:  Fall stamped sentiment
(digi stamp sentiment and fall images)
PanPastel: Falling leaves
365 Cards: Vintage with lace

Thank you for visiting!!
Hugs
Heather

Sunday, October 13, 2013

Really Reasonable Ribbon October Blog Hop

RRRBlogHop[1].jpg
Hello Friends!!
I am so excited to be participating in the
Hopefully you are visiting me from Cherry's Blog.
If you are just joining the blog hop, then you will want to start at the 
Really Reasonable Ribbon Blog.
That way you can see what you can win, and not miss out on any of the Design Team's fabulous creations using this month's
Really Reasonable Ribbon Assortment!!
Here is a photo of the Ribbon Assortment below!! 
Monthly Ribbon Club, Domestic
I just love all the ribbons in Bonnie's 
Non Traditional Holiday Color Mix!!
When I saw this month's assortment, I was inspired to Design a Couple of Non Traditional Holiday Digital Collage sheets!!  
Here is my card!
I used an image from Karen the Graphics Fairy for my bingo card background.
Pin It!
I used the Christmas Lights Multi Santin,  Shimmer Satine TurquoiseChristmas Vertical Striped Grosgrain from this month's assortment as well as Peppermint Baker's TwineVintage Bonanza Buttons, and 15mm Mulberry Rose.
  A Close up of my Card.
I used Scor Tape and Tombo Foam Tabs from 
Really Reasonable Ribbon, to hold my layers together, and elevate my tree and sentiment.
I used GIMP to create my Collage sheets "  I used images I found at the Graphics Fairy.  You can find the collage sheet in my Etsy.
I also did a couple tags.
On this tag I used the Shimmer Satin Azalea, Christmas Vertical Stripe, Multi Dots Christmas, Mulberry rose, Deep Pink Baker's Twine, and Pink Salmon Baker's Twine.
Close up
I used the Art Glitter Designer dries clear Glue and the Ultra fine Metal Tip to add polka dots of glue and outline my text boxes.  I used #7 Rose Gold and #183 Blue Angel.
Another Tag
I used the Shimmer Satine Turquoise, Catherine White Crochet lace, 15mm Deep Ivory Mulberry Rose, Vacation Totes Button, Apple Green Mini Ric Rac, and Cotton Candy Baker's Twine.
Of course I used more of the Scor Tape and Tombo Foam Tabs!
I used the Art Glitter Designer dries clear Glue and the Ultra fine Metal Tip to add polka dots of glue.  I used #142 Coral Reef and #183 Blue Angel.
Close Up
I used the collage sheet below to create my tags.
You can find this one in my Etsy too.
Here are the tag bases

****If you would like a chance to win my collage sheet, then just leave a comment below.  I will do a random draw from the comments, and announce the winner on Sun October 20th on my blog.****
I used my Perfect Layers Ruler to create a 1/16th inch border around my tree, bingo card, and sentiment.  
I just love working with this month's ribbon assortment!! 
 I hope that you have been inspired to create some fabulous projects and do a little shopping and maybe get yourself some fabulous finds from Really Reasonable Ribbon.
**Next stop on the Hop**
Time to hop on over to Tammy's blog,
 see what she has created, and leave her a little love.


I will be sharing with 
Brag Monday:  Graphic Fairy

 Thank you for visiting!
Hugs!!
Heather

Saturday, October 12, 2013

Vintage Christmas Bingo Cards Tutorial

Hello Friends!!
I hope everyone is having a Fabulous Day!
Today I would like to share with you an easy peasy 
Vintage Christmas Bingo Card that I created.
Pin It!
This was so much fun, super quick and will fit in an envelope to mail nicely!
Here is how I went about making my card.
It looks like this
***How would you like a chance to win my Collage Sheet??
Simple enough, just leave a comment on my 
REALLY REASONABLE RIBBON POST 
 and I will do a Random Draw and announce it next week.***
Next I cut out my pieces, and inked all the edges with Ranger's Vintage Photo Distress Inks.   I also went ahead an applied some of my
 Really Reasonable Ribbon
Scor Tape to my Bingo Image.
Next I use my Perfect layers Ruler to cut my black piece of cardstock (I just add a dab of glue from a glue stick to the back of my bingo image, and then used the perfect layer tool).  I added some fabby Black Diamond Satin Ribbon, and another layer of 
Scor Tape.  I also inked a piece of Red dots Ribbon, which I will lay on top of the black diamond.
I went ahead and adhered my black cardstock layer to my card base with Scor Tape.  I started to add some dot of 
 Art Glitter Designer dries clear Glue with the Ultra fine Metal Tip, to the holly berries.
I applied #175 Retro Red glitter to the holly berries.  I added more glue to the some of the outline of the Bingo lines, and covered them with #188 Black Vinyl Glitter.  I also took another piece of the Red dots Ribbon  and created loop, and glued the top to the bottom in the center (please refer to photo below).  I used the Peppermint Baker's Twine to create a cute little bow in the center of my Vintage Button Bonanza Button!
My last step was to glue down my Red dots Ribbon and then glue down my Vintage Button Bonanza Button.  Please refer to photo below for placement.
Here are a couple close ups of my Simple Bingo Card.
I just love how the Really Reasonable Ribbons, dress up my simple card!
The Peppermint Candy, Candy Cane and Holly leaves and Berries are ones I painted in GIMP.
I hope you enjoyed my Simple Vintage Christmas Bingo Card Tutorial, and that it inspires you to have a Jolly day...LOL.
I will be sharing with 
Brag Monday at the Graphics Fairy Thank you for Visiting!!
Hugs
Hether