My Challenge Blog

Saturday, February 28, 2015

St. Patrick's Day Tag and Vintage Ladies Spring Green Card Tutorial

Hello Friends!!
Today I would like to share with you a tag and Card that I have made using some fabby ribbons and trims from
Really Reasonable Ribbon.
Irish Tag
To create my tag I used my Purple tag Bases
Irish Bingo Cards, Light Green St. Patrick's Day Stamp images, Cream Stamp bases.

I used the Celery Plaid, Grape Satin, Purple Leaves, Lavender Seam binding, and Moss Green Seam Binding all from 
Really Reasonable Ribbon
 Paris and Jungle Art Glitters were used.


Vintage Green Ladies Card
Hidden tag removed
Supplies
Gecko Galz Pretty Victorians Digital Collage Sheet
Gecko Galz Vintage Tags
Vintage Spring Green Digital Papers
Micro Moss Green Gingham Moss Green Seam Binding, Moss Green SatinSandra White Crochet Lace1/4" Natural Crochet Lace Deep Ivory Mulberry Roses and Solid Green Baker's Twine Ribbons and Trims from Really Reasonable Ribbon.
I used my Bow it All tool to create my bows.
Jungle Art Glitter

Tutorial 
Created my card base using a sheet of ivory cardstock.  Cut two pieces of paper from my spring green collection.  Then layered the ribbon across the center.
Layered two of my images together (glued together).  I cut a smaller piece of one of the green gingham papers from my set.
I glued the green gingham in place (all edges inked with frayed burlap distress ink).  I glued the two images above to another one of the Gecko Galz tags and placed the foam pads in place so that I was able to slide in the last (daisy) tag into place once my piece below is attached to the card base.
Below you can see how I added double bows made out of the gingham with my Bow it all tool to the tags.
 Removed the one tag so that I could add the glue and Jungle glitter.  I also added the lace in the top right corner with a button and green baker's twine.  I glued on a moss green seam binding double bow and deep ivory mulberry rose.  The crochet lace is tucked up under my focal piece.
One last look at the finished card.
Thank you for visiting!!
Hugs!!
Heather

Wednesday, February 25, 2015

Snowman Chipboard Love

Hello Friends!!
Heather here and today I would like to share with you another
Guest Design Piece I have done using 
Gina's Chipboard 
and some fabby Ribbons and trims from 
Really Reasonable Ribbon.

First up I have a couple snowmen that I have done in a shabby chic style using Gina's Snowman Banner and My Floral Digital Papers.


I covered all the pieces with my papers then inked the edges with Ranger's Frayed Burlap.
I used Fauna, Storm, Just Peachy and Arbor Glitters on all of my snowmen.  I also added 1/4 natural crochet lace on each of the hats and then topped them with snowflake chippies that I covered in Fauna glitter.  Then I placed a Deep Ivory Mulberry Rose or
Baby Pink Mulberry Roses on top of that.  I added vintage buttons tied with  Cotton Candy Baker's Twine or Aqua Baker's Twine.  The buttons and snowflakes were elevated using

I also played with one of Gina's Birds on Key Set
I painted the piece first with Gesso, then water colors in blue, pink, and dark yellow.
After I painted it I put a layer of matte gel medium over it.  This way I could add another layer of water colors.  Below you will see I used some Golden Brown on the Key.
Next I added some darker blue to the blue birds and red to their chests and golden brown to the beaks.  I also stamped on the key with Tree Branch Archival Ink.  
For my Final step I added another layer of matte gel medium and then doodled with a black pigma pen.  I just love how it turned out!

I used Gina's 

Thank you for visiting Gina's Designs today!!
Hugs!!

Friday, February 20, 2015

Purple and Green with Ribbon/Trims Challenge at Really Reasonable Ribbon

Hello Friends!!
It is time for a new challenge at 
Really Reasonable Ribbon!
This time our theme is 
Here is a card I designed below.
So make sure you hop on over to the RRR blog so you can see the rest of the
wonderful inspiration pieces from the  Design Team.
I used Old Willow Organzaand my Bow it all tool to create the double bow in the top right corner.  I layered  Old Willow Organza, Juliet Lace, Pink Crochet Lace and Sweet Grape seam binding across the top part of my card under my focal image.
I used the Bow it all tool and more of the Sweet Grape seam binding to create the cute little bow on my St. Patty's Day ticket, in the lower left.  Moss Green Leaves were used on my focal image.

You can find all of the sweet St. Patrick's day images in my Etsy Shop here.
I can't wait to see what you come up with for our Purple, Green and Ribbon Challenge!!
Thank you for visiting!!
Hugs
Heather

Wednesday, February 18, 2015

Perpetual Chipboard Calendar

Hello Friends!!
Today I would like to share with you a Perpetual Calendar that I created using 
Gina's Chipboard and some fabby Ribbons and trims from 
Really Reasonable Ribbon.
I used some digital papers that I designed to cover all of the pieces.
I covered all the insides of the base with paper.  Then glued it together, and then applied paper to the outside. Trim excess paper with an exacto knife.  I glued Chloe Lace to just the top edges (please refer to photo below).  
I used embossing medium and tinsel gold to emboss all the corners and the and edges of the base.
I also embossed the words and base part of the label.  I covered one side of each of the tags with one of my digital papers as you can see below.  Then I trimmed the edges with an exacto knife.  Then I applied paper to the other side, trimmed them and then inked the edges with Frayed Burlap.  I applied paper to my label top in the same manner, and then the base was embossed.  On the back of the label base I added some Candi Fix it Foam Tabs.
Here is a look at the tags finished below.
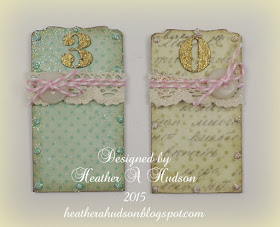
  I added Juliet and Cotton Candy Baker's twine as well as a button with a cotton candy bow to my number pieces.  Martha's yard, Fauna, and Cheeky Pink Glitters were used on the edges of all of my pieces.
Here is a look at it from the side.  I used the Corners which I embossed on both sides of my Calendar base.  The Bow it All tool was used with Pink Salmon Seam Binding to create the double bow on the front.
I have not decided yet on the words that I will be using on the front, so I left it blank for now.

I used Gina's 
and 

Thank you for visiting Really Reasonable Ribbon today!!
Hugs!!

Friday, February 13, 2015

February Really Reasonable Ribbon Blog Hop

Hello Friends!!
I am so excited to be participating in the
Hopefully you are visiting me from Karen's Blog. 
If you are just joining the blog hop, then you will want to start at the 
That way you can see what you can win, and not miss out on any of the Design Team's fabulous creations using this month's
Really Reasonable Ribbon Assortment!!
Here is a photo of the Ribbon Assortment below!!
I just love all the ribbons in Bonnie's 
"Purple and Green" Mix Assortment!!

I used the Shimmer Satin Kiwi, Grape Plaid, Sandra White Crochet Lace, Apple Green Baker's Twine and Celery Plaid on my Card and Tag.  
Tombow Foam Tabs were used to elevate my Images on the front so that I could slide the tag in at the top. 
Here is a look at the tag.
I used one of my tag bases and Irish Bingo Cards for my tag and embellished them with Gecko Galz images.
Here is a look at the two pieces together.
I used a couple different St. Patrick's Day Collage Sheet images from my Etsy shop.
I used my Bow it all tool to create the bows on the front of my card and tag.

I hope that you have been inspired to create some fabulous projects and do a little shopping and maybe get yourself some fabulous finds from Really Reasonable Ribbon.


**Next stop on the Hop**

Time to hop on over to Teresa's Blog see what she has created, and leave her a little love.

Thank you for visiting!!
Hugs
Heather


Wednesday, February 11, 2015

"My Love" Cherub Reliquary Valentine's Day Magnet

Hello Friends!!
 Today I am sharing my second Guest Designer Project using 
I used my Tiny Hearts in Pink Digital Paper to cover the back piece of the Reliquary frame.  I used one of my Valentine Cherubs as my focal.  
I used White Gesso on all the other chipboard pieces.  I glued the top piece of the Reliquary to the bottom piece.  I painted this turquoise, golden yellow and green (please refer to photo).
After I painted this piece I stamped it with Forget-Me-Not Archival Ink.  The bird piece was painted brown, blue and pink.  I did add some Pink Mulberry flowers and green dot glitter leaves.
 The Dangle was painted green, golden yellow, and pink. I used a number stamp and Carnation Red Archival Ink.
Coordinated glitters were added to the piece.
The Stackable label:  the base was painted green, top gesso with blue accents.   Of course I doodled on the whole piece with a black pen.
I just added a couple magnets to the back, so it can hang on our back door.
I hope you find some time to break out your chipboard pieces and get creative!!
Thanks for visiting!
Hugs!!

Sunday, February 08, 2015

Valentine's Day Tags

Hello  Friends!!
Today I would like to share with you a few Valentine's Day Tags that I created using some fabulous Ribbons and Trims from Really Reasonable Ribbon!
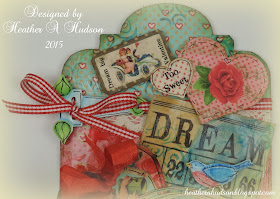
On this tag I used Red Seam Binding,  Red Leaves, Red Baker's Twine, Red and White dots OrganzaBrenda Crochet laceDeep Ivory Mulberry Roses, and Pink Baker's Twine.  I used my Bow it All tool to create a double bows for my tag.  I used the Old Willow Organza was used as my tie at the top of all three tags.

I hope you have a wonderful day!
Thank you for visiting!!
Hugs
Heather


Friday, February 06, 2015

Buttons and Bows Challenge at Really Reasonable Ribbon

Hello Friends!!
Time for a new challenge!

Here is a card that I created using some of my Digital Papers and Collage sheets as well as ribbons and trims from 
I started out by creating a standard A2 size card base out of ivory card stock.  Covered it with 3 of the digital papers from my 
(Red for the base, Aqua then a band of the cream with red hearts).
I also stamped on my paper with a swirly stamp and Forget me not Blue Archival Ink.  At the top I have a Double Bow that I created with my Bow it All tool and Lipstick Red Seam Binding.  My buttons have had bows tied in them using Raspberry Baker's Twine,
Here is a look at the tiny focal Conversation heart open.
On the inside of the base, I have added one of the focal's and one of the word conversation hearts.  You get the focals and tiny heart card bases in one set...and two sheets of word hearts in the other.
One more look at the finished card.
I hope you have enjoyed my card, and I can't wait to see what you link up to our challenge at 
Really Reasonable Ribbon!!
Hugs
Heather

Wednesday, February 04, 2015

Guest Designing for Gina's Designs "Valentine's Day LOVE Chipboard Tag

Hello Friends!!
Heather here today and I am sooooo excited to be Guest Designing here at 
I just love her Chipboard Pieces!!
My first Project of the month is my
Valentine's Day XL LOVE Tag!!
Here a couple of photos of how I brought this piece together.
To start off I used two of my digital papers 
(all listed at the bottom of my post today)
that I glued down to the tag base.  I used a green water color pencil to outline the top and bottom aqua papers, then added a touch of water to the areas.  Did the same to the center pink area, with a red water color pencil.
I also used Carnation Red and Forget Me Not Blue Archival inks with some background stamps to stamp on my piece (please refer to photo above).  Added a few drips of red water color paint and Juliet Lace.
Below you can see that I have covered the chipboard pieces with a coat of gesso.  I will be using the banner pieces in another project this month :0)  Notice I used my crop o dile to punch 1/4 inch holes in my hinges. 
Below I added one of my Dream Bingo images that I stamped and used water colors on.  I have applied some pop dots to the back of my chippy pieces.
Below you can see how I added some water color paints to my chipboard pieces.  I used pink, greens, yellow, red and blue water colors on the scribble piece.  You can see how the leaves are coming along on my hinges.  
Covered the pieces with a gloss medium and did some doodling.  I threaded the red gingham through the end of the hinge (ribbon is now doubled and wrapped around the back of  my tag), then one end up through one hole and the other end through the other hole...then I tied the bow.
The rest of my pieces were just placed on my tag with pop dots etc.
Here are a couple close ups of my piece.
You can see below one of the hinges I used.  Simply painted it with White Gesso, then added some green too look like leaves..and a touch of blue...for some depth.  My whole piece was covered with Clear Gel Tar from Golden Acrylics (you could use a gloss medium, in the same way).

I decided to doodle on pretty much all of my tag pieces...using a Pigma Black Micron Pen.  Below you can see that I used pop dots on the back of my Round Focal and scribble bird (see above for placement), and watch your placement, because the extra heart tag needs to be able to slide in.
 As soon as I saw the brick sheet of Gina's....I new I would be using some of the bricks for Sentiment Blocks...yummy!!  They were painted with Gesso, Water colors and then my text boxes applied ..pop dots added to the back so they would add more depth to my piece.  You can get a pretty good look at my doodling below.
I just love the Typewriter letters in GOLD!!  I just glued them on as is...then glued the one leaf chippy part to the top of the letter "L".  The best part is that you can order the letters that you WANT...wooo hooo...so no more letters you don't use...that go...hmmm...what can do with this??  LOL
My heart tag in the center is of course is removable.

Here are the links to all the fabulous pieces of chipboard I used
 Bricks  

I have also used 

All images and papers are ones that I designed.
Thank you for visiting today!!
Hugs!!
Heather