Friday, May 31, 2013

Vintage Picture Frame at Art Glitter

Hello Peeps!!
I have another tutorial for you today using Art Glitter.
Just hop on over to the Art Glitter Blog to see my creation and the tutorial!
Here is a sneak peek.
Hope you enjoy the tutorial!
Thank you for visiting!!
Hugs
Heather

Monday, May 27, 2013

Thank You Card

Hello Peeps!!
 Hopefully I and my bestie Ginny are riding the spinny rides and roller coasters at Cedar Point while you are reading my post today.
  
Today I would like to share with you a Thank you card that I created using some fabulous ribbons & trims from Really Reasonable Ribbon and Digital Papers & Ephemera from Gecko Galz.  Of course my favorite Art Glitter.
Pin It!
I used my favorites Raspberry baker's twine, champagne netting, Pink Salmon seam binding,  Pink beads, Latte buttons and candi fix it foam pads from Really Reasonable Ribbon.
I used some Art Glitter Designer dries clear Glue and Ultra fine Metal Tip to outline the edges of my card and added the#162 Just Peachy glitter.
Here is a close up of the pink beads...Yummy!!
I used Wild Roses digital papers and Spring Time Ephemera from Gecko Galz for my backgrounds and main image.  I attached my first layer to a 5" by 7" ivory card base, then glued on my seam binding and champagne netting.  I used a Martha Stewart punch and attached it to my next digital paper and image after I wrapped my Raspberry baker's twine around it and tied a bow.  I used the candi fix it foam pads to elevate this layer.
I inked all my edges with Ranger's Vintage photo.  The two darling little buttons came from the latte collection and were tied with the Raspberry Baker's Twine.
One last look at the whole card.
Hope you find some time to create today!
Thank you for visiting!!
Please don't forget that Bonnie has a fabby
Memorial Day Sale going on Now!!
Hugs!!
Heather

Saturday, May 18, 2013

Patriotic Tag Two :0)


Hello Friends!!
Happy Saturday!!
Today I would like to share a tag I created with you using some fabulous Ribbon's and Trims from Really Reasonable Ribbon!
I used the Polka Dot ribbon and white crochet lace from this month's RRR assortment.  
Above you can see the red diagonal ribbon, the polka dot ribbon, Air Mail baker's twine, and a white candi.  I used the candi fix it foam pads to elevate my heart image, bell, star and text boxes.  I inked all my edges with Ranger's vintage Photo.  
I inked the polka dot ribbon with Ranger's Vintage photo as well.  You can see the red candies and the white crochet lace in the photo below.

One last look at the finished piece.
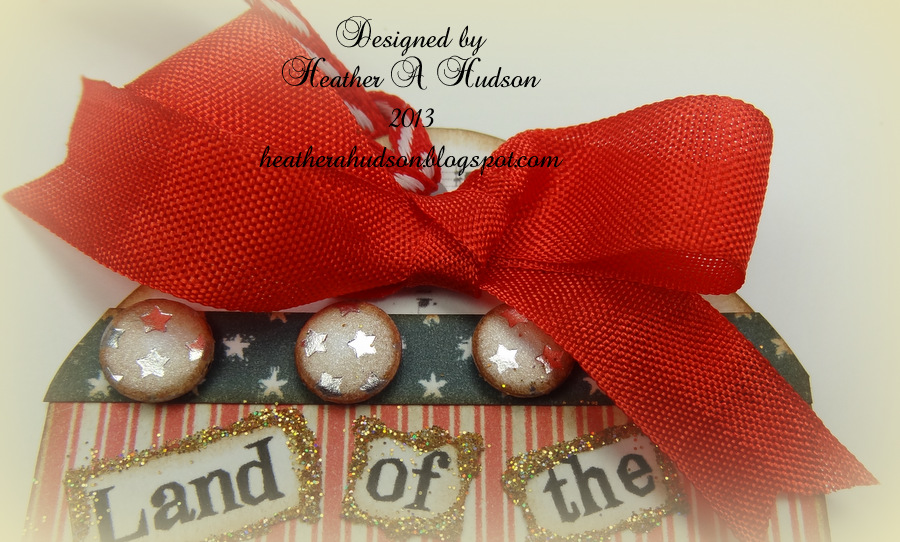
I tied off the top with some more of the air mail baker's twine and the red glittery red  ribbon from this month's assortment.  The images are all ones I designed and put on a collage sheet.
You can purchase it in my Etsy store here:  

I will be sharing with the following places


Thank you for visiting today!!
Hugs!!
Heather

Wednesday, May 15, 2013

Really Reasonable Red White and Blue Challenge

Hello Peeps!
Happy Wednesday!!
It is the 15th, and it is time for a new challenge at
Our theme is Red, White and Blue + Ribbon of course!
I decided I would create a tag.  
Pin It!
I used the Red Glittery, Blue Glittery and White lace from this month's Really Reasonable Ribbon assortment.  I also used the
I also outlined my heart, star and text boxes with my new favorite art glitter #337 Challis.  I used the Art Glitter Designer dries clear Glue and Ultra fine Metal Tip to glue down my pieces and outline areas for glittering.
I inked all my edges with Ranger's Vintage Photo distress ink (then covered it with glitter...lol...so what was the point...hmmm...silly me).  I love how the candies look when they are inked!!  As well as the Air Mail Baker's twine bow!
You can see where I used the candi fix it foam pads to elevate my candies, heart and some of the text boxes.  I really love the glitter...gives it that old vintage look!
Topped it off with the seam binding bow and red diagonal ribbon tie.  
One last look at the finished tag below.
I created the tag from a collage sheet that I designed using an image from the Graphic Fairy.  You can instantly download it from my
Etsy store here.

Earlier Today
Today I have two posts...so if you missed my First Art Glitter Post,
you can see the step by step tutorial here.  Here is a peek below
I also used some ribbons and trims from Really Reasonable Ribbon on my project. I used some lovely

Thank you for visiting today!
Can't wait to see your Red White and Blue + Ribbon projects!!


I will be sharing with the following places
Brag Monday at The Graphics Fairy
Make it Monday:  Anything Goes

Hugs
Heather

Art Glitter Tiny Spring Canvas

Monday, May 13, 2013

Really Reasonable Ribbon Blog Hop!!


RRRBlogHop[1].jpg
Hello Friends!!
I am so excited to be participating in the
Hopefully you are visiting me from Cherry's Blog.
If you are just joining the blog hop, then you will want to start at the 
Really Reasonable Ribbon Blog.
That way you can see what you can win, and not miss out on any of the Design Team's fabulous creations using this month's
Really Reasonable Ribbon Assortment!!
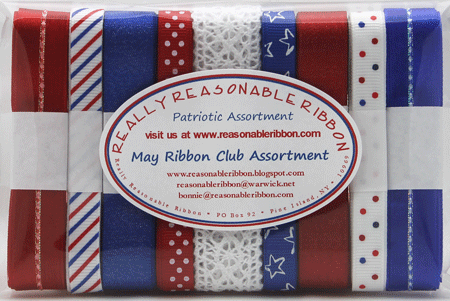
Here is a photo of the Ribbon Assortment below!! 
Monthly Ribbon Club, Domestic


What a LOVELY Americana assortment!!  I love all of the red, white and blue colors in this month's kit. 
I thought I would make an old Americana style card.  I used some images from the Graphics Fairy, and made the collage sheet below.  You can purchase it and instantly download it from my Etsy shop here.
Here is my card.
Pin It!
   I inked all the edges with Ranger's Vintage Photo distress inks.  I also used some scor tapeBritannia candies and candi fix it foam pads from Really Reasonable Ribbon.  
I inked the ribbons and candis with Ranger's Vintage photo distress inks.  I use Art Glitter Designer dries clear Glue, and Ultra fine Metal Tip and then applied #337 Challis art glitter around the edge of some of the pieces.
Here is a close up below of some of the other fabby trims and ribbons that I used from Really Reasonable Ribbon.  I used  some red leavesbaker's twine, and a Latte buttons to top off my card.
 I also used the blue with stars and red with white polkadots ribbon from this month's assortment.
I just love this month's ribbon assortment, and enjoyed working with it!! 
 I hope that you have been inspired to create some fabulous projects!

**Next stop on the Hop**
Time to hop on over to Tammy's blog,
 see what she has created, and leave her a little love.


I will be sharing with the following places
Brag Monday at The Graphics Fairy
Make it Monday:  Anything Goes

Thank you for visiting!
Hugs!!
Heather

Thursday, May 09, 2013

Gecko Galz National Scrapbooking Day Project

Hello Friends!!
Happy Thrusday!!
It is my turn to be featured at Gecko Galz
I am not a "Scrapbook Page" kind of gal, as most of you already know, but to celebrate National Scrapbook Day, we were each asked to do some kind of "Scrapbook page."  I finally decided to do an Artist Journal.  I am super happy with my two page spread!  Thank you Leanne, because I have been wanting to do one...and just have not got around to it.
I had bought my youngest son a really nice big artist sketch book last year for his birthday.  Yesterday I asked him if he knew where it was...and believe it or not my Sweet Hubby, and both boys go...it is in the garage sitting on a table under the big box of Soy milk!  Really??  I was more surprised that they all KNEW where it was (everything gets lost in the Hudson house..so we end up with two or three of everything).  I went out to the garage and found it, dusted all the dirt off of it and brought it in.  The pages are kind of thin, so I used a glue stick and glued two pages together (so it would be more sturdy).
I started off with putting a piece of Ranger's Tape down the center where the pages met, so hopefully that would keep the pages together, and if I were to add a lot of paint, it wouldn't seep to the other pages.  Then I printed out one of the Dapper Dan digital papers from Gecko Galz.  It has different scripts, types and old papers all on one sheet, already collaged, so I just ripped it up and added it to my pages.  I used a matte decoupage medium, applied it to the back of my pieces and my page, then simply placed my pieces where I wanted them.  
This is the upper left of the left page.  you can see my clusters of images from Gecko galz.  I used the Time Flies (clock faces through out pages), Autumn Leaves (birds on branch),  and Butterfly wings Digital Ephemera pieces, which you see above.  In the upper left you can see where I used some Stazon Jet black ink and one o the Garden Icons' clear acrylic stamps, also from Gecko Galz.  
I used an olive green copic marker to do my journaling and to draw some free hand leaves around my folk art roses.
Here is a look at the lower left.  I used some more of the clocks, and  Papillion Jewels from Gecko Galz as well as some of my own die cuts that I have created using images from the Graphics Fairy.  My journaling says "I took 100 photos to get two that I liked."  That is not a lie...LOL.  I added a little crown of forget me nots to my hair...awww....lol.  The bluebirds are one of my favorite die cuts I made.  
Here is a look at the right side below.
Again I used many of the clocks, and a little fairy from the Pixie Children Collage sheet from Gecko Galz.
I used plain computer paper to print out all of my digital papers and images.  They work great for layers...not too bulky.  Some of my die cuts were cut from 80lb cardstock (I used ones I had left over from other projects), and they were kind of thick.  So I prefer the thin paper.  The adorable kitty is from a new Vintage Cats and Dogs collage sheet you can get in my Etsy shop.  The kitty looks like our two kitties, Mr. Kittens and Mr. Snuggles.  I used my filbert brush and a mix of green paint to paint some simple leaves, then shaded them with a darker mix, using an angle brush.  I shaded the edges of my page, and around all my clusters of ephemera, to set them all apart from the pages.
Here is a look at the lower right page.  More clocks, bluebirds..and a gorgeous Rose and Pansy.  You can see the stamp I used well here to the far middle right.  I also used the Art Glitter Designer dries clear Glue and Ultra fine Metal Tip and outlined all my pieces, then applied the #85 Crystal Art Glitter.  This is my favorite cluster :0).  I also used a mix to add some plain coral pink circles that I then shaded with a darker color to look like old folk art roses (minus the strokework...I perfer them this way..lol).  My journaling to the right says "I will always be a Gecko Gal."  This was the first DT that I auditioned for, lead me to play with Digital images in GIMP.  Totally Changed my paper crafting!
One last look at the whole page. 
I am so happy with how it turned out, that I will be doing some more of these.  I had a TON of fun!  Maybe I can become a scrapbooker....Heather style...lol.  Since it is a book, I kept my pages flat...but I can't promise that I won't add some lace or ribbon...because while writing this post..a few things have popped into my head.

Now don't forget to visit Gecko Galz to see the rest of the DT's pages!!


I will be sharing with the following places
Brag Monday at The Graphics Fairy
Make it Monday:  Anything Goes


Thank you for visiting!!
Hugs
Heather


Tuesday, May 07, 2013

Garden Starter / Volunteer Gift pot and Tag Tutorial.

Hello Peeps!!
Happy Tuesday!!
All I have to say is thank goodness the sun is out in Michigan!  I have been waiting for spring to get here...forever!  I spent my days off last week hitting all my favorite flower greenhouses!  Now I have a lots of annuals to mix in with my perennials.
My Mother, Mother-in-law, and a few friends love exchanging perennials so today I thought I would show you what I created to put my little starter plants in.
(sorry I tried to take some photos outside...but too sunny...as if!!).
I will be sharing this Tutorial on the RRR Blog today as well.
Pin It!
Every year when I start planting my annuals, I have all these little plastic pots floating around my gardens, driveway...and yard...LOL.  I always use some of them to put my starter plants (little volunteers that showed up in another area).  I thought I would do a little something different this year.
So maybe you may have one of these floating around your garden??  While you are grabbing one of these, grab the newspaper (there always seems to be a few in our driveway..and we don't get the  paper) that is laying in your driveway.
I used a gloss collage glue (ran out of matte finish) with an old brush and applied it to my pot.  You can see the glue below, as well as a piece of newspaper that I took from the Garden section...lol.
Don't worry about being fancy, just cover up your pot with newspaper (tissue paper, scraps, book sheets, music paper...would all work nicely).
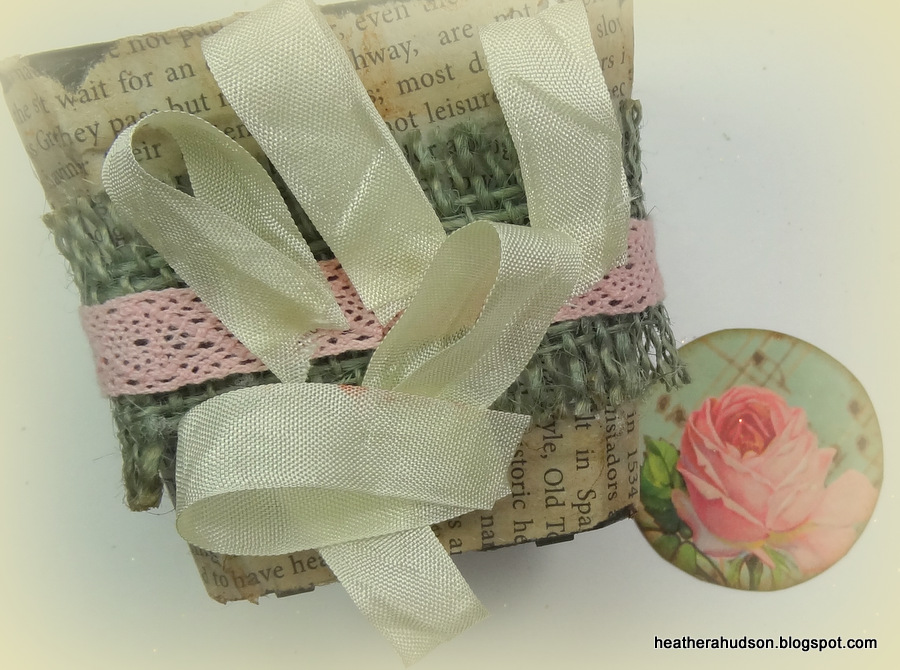
Once you are done with that (I dried mine with my heat it tool), apply a bead of hot glue around the center (refer to photo above) and add the jute trim from Really Reasonable Ribbon.
I applied some Ranger's Vintage photo to my piece, then applied another bead of hot glue, and applied the RRR pink crochet lace.  I also punched a hole in the top right, with my crop-o-dile.
Next I cut out 8 pieces of 1.5" of  RRR cream seam binding, folded them in half and glued the ends I know you are thinking she only has 6 in the photo...does she really mean 8?...I started out with 6, then decided 8 would be better.
I used a round vintage circle piece from one of my collage sheets I designed, inked the edges with Vintage Photo, and applied some candi fix it foam pads from RRR.  I glued the ribbon edges under my circle (this is when I decided I wanted 8 pieces..lol).
I used an Ultra fine Metal Tip and the Art Glitter Designer dries clear Glueand applied the #267 Cheeky Pink #193 Martha's Yard and #295 Ensalada art glitters to my circle.  I also made a tag from my Vintage Spring ATC collage sheet.   I made little text boxes that read:  From my garden to yours.
I used a newsprint candi, ivory crochet lace, moss green leaves, mint jute twine and pink bead trim all from Really Reasonable Ribbon on my tag.  The newsprint mini candi..has part of the word garden on it (not planned...too cool).  In addition to the glitter colors above, I used #92 Banana and #337 Challis on my tag.
I tied my tag to my pot, and added my flower.
I will write the name of my flower on the back of my tag.
One last look at the finished piece.
I hope you have a great day, and that if you garden...the weather is great so you can get out and play in the dirt, and maybe make a few of these for your Gardening friends!!

I will be sharing with the following places
Brag Monday at The Graphics Fairy
Make it Monday:  Anything Goes


Thank you for visiting!!
Hugs
Heather