Friday, January 28, 2011

Hope...My first Mixed Media Project

This evening after I had my coffee...I still couldn't get that Kraken out of my head....it is just "not me."  
I had an idea....I had just bought some watercolor crayons to try
and decided that I would try something fun.
I sketched a simple angel.  Then transferred it onto 
my canvas.  Used my Crayola crayons...to doodle some
roses on the "background"
So the blue is a wax crayon...and the green is a watercolor crayon.  So once you are done coloring..you just use some water...and wah lah...LOL
After I applied all my watercolors....I let them dry.  Then I used acrylic paint to go back in and do some shading.  I used the stamps I carved to add some design too.
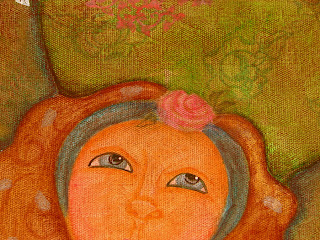
Here you can see the crayon showing through the green...and the swirls in the hair...are crayon too.  How fun is that?  Simple face...because I didn't wan to have to look for paint colors...I just used what was with in reach...(lazy I tell you).  
This dress started out as plain ivory cardstock.  I stamped with Stazon ink in black.  I also used a white crayon and did some swirls (you can just make them out).  I then inked the whole thing in Fired brick by Ranger.  The whole piece has been antiqued.  I then added some Dew Drop Brilliance and Perfect pearls.  Just the right amount of glitz!
Here you can see one of the crayon roses too...and my "Hope' Charm.  I also did some random stamping...LOL.
Here is a shot of it on my Red Room Wall...in this shot you can see the perfect pearls and Brilliance quite well.
One last "normal" shot
Thanks for visiting!
Go get your crayons....and have some fun!
Hugs!

This JUST in: A Kraken has invaded Swirlydoos OH NO!

Hi...and welcome to Heather's 
Off the beaten path
"Lets get Kraken"
Scrapbook page
Lets just dive right into it!
Different....isn't it!  
This is not my normal type of page for a swirlydoos kit.
The colors were bright and fun...not so Romantic.
So I just stepped out of the old
COMFORT ZONE
and did a more Artsy page.
I was to lazy  to use any machines last night...lol.  I just drew the images and then cut them out of paper from my January Kit.  I learned a fun technique over at 
Scrapbook News and Review Magazine
Scarlett there is doing some tutorials on Mixed media.  Fun!  This tutorial simply used crayons and Ranger Inks and a roller.
I used a white crayon on my  waves and then inked with Chipped Sapphire.  I used a blue crayone to outline the "kraken"..and then inked him in Fired brick.  I drew bubbles and "motion lines" through out the background with a blue crayon, as well as  a tiny ship in the lower left.  Inked all of this with Chipped sapphire.
I also used Ranger's perfect pearls in Turquoise and Luminarte Fadiant Rain in Key lime...to add some glitz to this layout.  It is hard to tell in the photos..but it is sparkley.
I took another piece of paper from my kit to create the scroll.  I drew it out, used a Raw Sienna crayon and Ranger inks in tea dye and walnut stain.  The lettering I did using my Favorite font LDI Fancy Folk.  I  just printed, created an offset and cut it out.  It too has been inked and glitzed.
The photos are from the boys first swim meet.  Neither of them could see the end of the pool...LOL.  I guess we will be purchasing prescription goggles.


Thanks for visiting....my Interesting post today!
Hugs!
Heather

Tuesday, January 25, 2011

My Artistic Adventures

Hello Friends!
I decided to work on a Layout today.
It is a "Who I am Artistically."
You can't get more "Heathery" than this layout.
All stamped images are ones I hand carved.
I used my all time favorite punches...that I feel are very "Versatile."
All of the roses above are images I painted in GIMP.
Then using my SIlhouette SD machine's "Print and Cut' feature
I was able to cut them out.  The Rose to the Left is my 
"Stephanie Rose"...I created it for a mini (sadly have not finished) for a friend with Breast Cancer.  
I have my Vintage looking Tea Cup die cut I created along with a
very "Vintage" feel Rose Border.  This border is actually two pieces, side by side.  I used some Pearls and a Fab paper clip
that I got from my Best Friend's Scrapbook store along with the background paper.  Better get to her store quick..before I buy it all...LOL...I just love it for that "Vintage Feel."
I am happy to say I will be Designing at her store
Here you can see my pull out tags.  If you didn't know...I have a thing for hidden tags..or tags on a page.  I just love being able to pull out items on a page...and "touch" them.  The photos are my sweet boys and DH.  You will see my Artistic time line on the pull out tag.
The time line starts with collecting fabric, tole painting, mosaics, pottery...and of course playing with paper!  
The Rose picture die cut (center top)..was my first painting that I sold on Etsy..of course the original had a blueish grey background...but that didn't match..LOL.
I loved the Dusty Attic's Chipboard piece "Dreamer."  I embossed it   with gold.  At the top you can just make out in this photo my 
"Bella Beauties" and "Swirly Savage" badge's I made.  They represent where I like to play online with my Fabulous New Friends!
I am going through what I call a "Poofy Stage."  I really don't 
like taking pictures of myself.  So today I curled my hair (that doesn't happen often)..and threw on some make up (happens even less than hair rolling)..and took a few photos.  They were icky!
Unfortunately Make up and Curly hair don't cover up 'Poofieness."
So...I play around with Gimp...lol...and cleaned myself up a bit.
Because...in my mind ...that is who I am Artistically.
(LOL...I crack myself up).

I hope this inspires you to create a page about 
"Who you are creatively."

Thanks for Visiting!
Hugs!

Sunday, January 23, 2011

Valentine's Day Mini (Easy Peasy)

Hello Friends!
I am super excited because I will be teaching my
first scrapbook project at my BF's Scrapbook store:
You will find her blog button in the upper left...feel free to snag it and add it to your blog.
I would suggest you become a follower, because she will
be posting lots of scrappy fun projects and challenges
for you to take part in.
Here is a photo of my first Project.
The class will focus on learning:  
Stamping, Inking and distressing...in an artistic style 
and how to assemble your flower clusters.

The inside I have not finished yet, but it will be simple...so that the focus can remain on assembling the cover and learning techniques.
I will post more Photos when I have the inside complete.
Thanks for visiting!

I am off to "Ice Skating Lessons"...that my DH signed the family up for...LOL
Hugs!


I am back from Ice Skating...and I actually saw some friends there and had a good time (but don't tell DH...lol)
I did a little more work on my
Valentine's Project
This is what you see when you open the little flap...
I simply just cut out the shapes from a great sheet of paper.
Here is a close up.
Here is what you see when you flip the first page up.
Those of you who "know" me...know most of my work is what I call
"Chunky"...meaning it is bulky and better suited for a frame or shadow box..or even a canvas.  I am trying really hard to keep this as flat as possible, and not add to much...yet still achieve that
"ohhhhh....I love it....feel"
The little red heart and "Be Mine" are cut from that same sheet of 
paper as well as the image above them.
Close ups
Another close up
All the stamping has been done with my hand carved stamps  :-)
You may recognize the "LOVE" stamp on the cover as one of the images I painted and cut out with my Silhouette SD.
Below you can see the little heart comes out...so you can include a 
"Little luv Note"
This is what you will see when you fold the last flap down.
I used my tiny heart die cut I painted...with some scraps of
punched paper as tiny wings. 
I didn't show the whole thing open...that will have to wait
till....I am finished.

I used the little black paper clip to weight down the page for the
photo.

Thanks for taking the time to visit today!
Hugs!

Saturday, January 22, 2011

Cupcake Shaped Birthday Cards

I have been playing around with the 
Silhouette Studio Program that came with my
 Silhouette SD Digital Cutting machine.
One of the calls over at 
Was for a "Cup Cake" shaped Card 
(or card with a cupcake shape on it)
I used my Silhouette Studio program and the 
Freehand Draw tool to create my Cupcake image.
I submitted my card and am excited to say that is was chosen for 
publication in the February Edition.  
I will post photos of it when the publication is over.
Thanks for visiting!
Heather
Oops..just remembered I never posted the card...lol..here it is below
I drew this cupcake using my Silhoutte Studio program.  I used GIMP to paint it.
Here is another with out the candle.This is the envelope below.
The other side
The card
The card opened..I got the idea from a card my mom had been sent..a Christmas card with windows.
The flip side


Thanks for looking..Hugs!!
Heather


Friday, January 21, 2011

Mail Art

Those of you who know me, know that one of my goals for the new year was to try submitting a piece of artwork for publication.  I finally got my stuff together and figured I would give it a try.
It was for one of my Favorite Magazines.  
Stampers' Sampler


One of the challenges was to do something creative with a
Hot Air Balloon Template.
    
They ask that you send a self addressed stamped post card 
if you would like to know if your artwork was received.
Below is the envelope that I enclosed.  I decided to make it
"Heathery" by stamping it with some of my hand carved stamps made from images I drew.


The balloon is the template that was provided by Stampington and Company.  I just added a little to it so it was easier to cut out with my Silhouette SD.

I used GIMP to paint the background for The Hot Air Balloon above.  I used Fired Brick distress ink by Ranger for the stamping and inking of the edges.  The envelope was stamped with my images using Ranger's Peeled Paint.  I distressed all around the edges with the same two colors.
I received the envelope back.  I will take a photo of it.
I won't know whether or not my piece will be published for a while. LOL.  
Either way...doesn't matter...at least I sent something in!

Thanks for visiting!
Hugs!

Thursday, January 20, 2011

Carol's "Curio" Mini Album

Today I had a little time to get started on the Mini 
album I am doing for the
Carol and I both joined in last minute..and are paired up.  We decided that we would just do a mini album..that didn't have to be 
Valentine's day.
Here is what I have for the cover so far.

I am using Curio Papers by Basic Grey.  I have stamped and inked..and embossed the cover.  I added some cut work lace paper (from the Curio line) and a couple layers of punched strips in black and ivory.
Here is a close up
The trim is Fabulous!  Got it on sale!
I added a skeleton leaf, some Christmas pick pieces and a stick pin so far...along with one little dangling bead that didn't quite fit on the cover.  The back cover looks the same, it has the Fab trim, but no flowers..or pokey things...LOL.

Thanks for visiting!
Hope this inspires you to create some beautiful for yourself
or friend!
hugs!

Tuesday, January 18, 2011

Helene's Tag Challenge at Bella Creations

I finally got all the pieces of my tag for

She provided a beautiful vintage image for us to play with.
Here is what I came up with...and of course I used some of the 

Here is the full tag
I used some Utee for the hearts and love stamp...to make them look more like a glossy sticker.
Here are a few close ups.

I had fun altering the image..and added the tiny corsage to her dress.
I used Ranger distress inks in:  Peeled Paint, Fired Brick and Vintage photo on the pink, and ivory cardstock, the die cuts and image itself.

Thanks for visiting!

Hope this inspires you to create your own vintage Valentine's Day tag!
Hugs!

I WILL have my CUPCAKES...and eat them TOO! ATC Card

I made some cup cake die cuts this weekend and
designed this cute little ATC.
I am always hearing....the phrase
"You can't have your cake...and eat it too"
I am thinking....WHY NOT?
I used the LDI Fancy Folk font, and my Silhouette Studio program
to design this ATC.  I painted the cupcakes in GIMP...after using the free draw tool in Silhouette Studio. 
Thanks for visiting!
Hugs!
Heather

Valentine's Day Love Ticket

Hello Friends
I have created some fun Valentine's Day love tickets!
This is a set of 8 die cuts
that can be used on any of your Valentine's Day Projects.
I have them available in my 

I painted these in GIMP
then used my Silhouette SD's "Print and Cut Feature" 
to cut them out.
Below is a close up


Here is a picture of the set of 8 die cuts below


Please feel free to email me with any questions!
Thanks for visiting!
Hugs!

"Micupoftea" inspired tea cup die cuts

Hello Friends
I was inspired by my good friend
Shawn....my favorite Tea Snob 
to create these pretty 
cottage chic style tea cup die cuts.
I have them for sale in my 
Here is an up close photo

Here is a picture of the set with a Ruler
They are printed on white textured card stock.
Feel free to email me with any questions!
Hugs!

Sunday, January 09, 2011

Heather's Holiday Spirit Link Up 2010 Winner

Hello Girls!


Okay, I put all the entries into a container...held it up over my head...and grabbed...


CAROL
Woot!  Woot!
You win some goodies!


The whole idea behind my little contest here was to see how many links I would get linked up and to see everyone's Trees!
Therefore
I announce that I have a small prize for those of you who posted your tree picture!
Meaning
Shawn, Jennifer, Pam. Sandi, Carol and Kim
please private message me your snail mail for your little goodie!
Happy Sunday Girls!
Hugs!

Sunday, January 02, 2011

Valentine's Day Collage

One of my New PIT friends asked if I would
like to join her in doing a little something new over at 
Soon you will be able to join the new group
Collage.
Here is my first sample for our first thread.


I was so excited!  I couldn't wait for the glossy accents to dry on my rose image, and that is why it appears cloudy.  Needless to say I will post another picture once it dries.
If you are interested in some of the steps--continue on.
I started with a Gallery wrapped canvas.  These are nice because they are 2 inches thick so they will stand up on their own or you can hang them without a frame.  The first step was to give the canvas a couple of coats of acrylic paint.  In this project I used Delta Ceramcoat Maple sugar tan.
Next I used a flourish stamp (any airy stamp would work).  I stamped the edges of the piece with Ranger's distress ink in Vintage photo.  I also did just a little around the front of the canvas.  This is rather difficult because you can't get good pressure on the stamp (because there is nothing supporting the canvas).  Let me show you and example of a boo boo....LOL.
No matter how much pressure I applied to the stamp, the impression just didn't want to stick.  So I did what I always do--just fix it.  I stamped the same image on cream cardstock, then inked and distressed it with Ranger's vintage photo.  You can also see here that I inked the edges of the canvas in worn lipstick and again in fired brick (both Ranger Distress inks).  The black stamp was done in Stazon's Jet black.  This is important, because that ink won't smear.  Unfortunately the Rangers ink will when you add any waterbased collage medium over it.  So, you can find other colors of ink in Stazon's that you like and use those.  Normally I would apply a light coat of Clear acrylic spray (but it is too cold here to do that--lol).  If you do light coats, it will dry fast, and be less likely to smear.
I knew I wanted to incorporate a piece of cardboard.  So I drew out a heart and cut it out.  The rose is one of the images that I painted a while back.
I decided to have a little fun with the cardboard.  I tore off some of the top layer.  I am thinking that I will curl the upper left part of the heart to add even more depth.
I cut out a stip of black cardstock that was just wide enough to accommodate this Martha Stewart punch.  I will be cutting it down...no specific size...just however it looks good.  That is pretty much how I do things.

A lot of what has happened here...is stuff I figure you already know...or it is easy enough to explain with out a photo.  
The flower in the upper right was made with plain white card stock. You can use one of your favorite punches, die cuts or svg/gsd files for the flowers.  I used a Silhouette SD file.  I stamped all the pieces (front and back) with the same flourish stamp (jet black ink), then used the same three Ranger inks to color the flowers...front and back.  I stamped a flower stamp (I created this one) onto the heart with Stazon jet black ink.  I inked the whole thing with the same tree colors of ink as mentioned before.  The piece of paper in the upper right is just a left over scrap.  Actually I was practicing using the "love stamp"...apparently...so I just used it.  Any scrap of paper you like will work..and just stamp on your sentiment.
I used stickles in tea dye to form little dots around the edge of the heart.  I also used some left over berries and a leaf from my 
The leaf was actually really big, so I just cut out leaf shapes between the veins.  I used hot glue to adhere all my items to my canvas.  You can use what ever type of glue you like...I just like fast and goopy
Before I added the stickles,  I gave this a few mists with Ranger's new Copper Perfect pearls mists.   I used my Crop O Dile by We are Memories to punch a whole in the cardboard and insert a grommet. I took a piece of lacey trim and inked it..and tied it in place.  One of my favorite things ...is vintage buttons.  I put them in most of my layouts.  I simply take a piece of gold (or any color you like) beading wire (mine is Darice 24 gauge).  I thread the wire through the shank and then give it a twist to hold it in place.  You can see that done 
I use the same stick that I used to curl the wire to curl the paper back on the heart.
Here you can see the Mya Roads chipboard key that I used red embossing powder on.  You could use some fine red glitter.  I was just looking for fast and painless.  I applied glossy accents to my flower die cut (these are in my Etsy store...well..they will be).  You can use any flower or Valentine's day die cut you like!  I used pop dots (a good amount) to make sure that when I applied the glossy accents to the flower..it stayed connected to the canvas.  I used a small antique bronze pearl to fill that white space to the right.
I cut out a strip of card board to fit in the space I had left.  I then glued a piece of  ivory card stock (use what ever you want) to it.  Then distressed the edges with my craft knife and inked it.  Using Ranger's Vintage photo and a little Worn lipstick.  The last little touch was the Peace love charm.  I got that from the jewelry (can you say clearance isle) at Michaels.
Here is the finished piece one more time.
Here are some side shots
I will also add some of the distress sparkles to the sides..to give it a little glossy look.
Feel free to contact me if you have any questions!  
Thanks for viewing this extremely long post!
Hugs!
Hope you are inspired!


Okay Bella Beauties...Post your Photos here...if you need help just let me know!