Saturday, March 30, 2013

Goodbye Google Reader :0( Hello Feedly Reader Tutorial

Hello Friends!!
This is my second post for the day.  You don't want to miss my
Sugar Creek Hollow post from earlier today.

We have all heard now that Google Reader will be going away, so I thought I would show you what I did to make sure that I continue to find the blogs that I follow :0).
Here is a link to where you will want to visit below.
The page will look similar to the one below.
This is what I did next.  I chose to Connect to Google Reader.  It asked me if it could use my information (something like that), which I allowed.
This is what shows up next.  It shows up as a list.  I decided to click on "Organize."
This is what you will see next.  All the blogs listed under their categories I created in Google Reader.  Then I decided to click on "Preferences."
This is what the Preferences page looks like.  I chose the "Full Articles" and then chose "Today."
Here is what you get :0)  Reminds me a lot of Google Reader.  You will get the featured articles across the top, and then a list of the blogs with an image to the left (my first couple blogs listed didn't have photos...but if you were to scroll down..there were photos).    Just like Google Reader, you can extend or collapse your lists on the left.
Here is what it looks like when you select one of the blogs...I will Visit Sandi's blog as an example.  If you click on the Post Title, it will take you to Sandi's blog.
I clicked on the title and was taken to Sandi's blog!  Wooo Hooo!  Oh...and Don't forget to check out her "Christmas in the Bank" challenge!!
Super Easy Peasy for me to switch over.  So hopefully you will find this helpful, and be able to make the switch with ease.

Thank you for visiting!!
Hugs!!
Heather

Sugar Creek Hollow Week 54

Hello Friends!!
Happy Saturday!!
It is week 55 at Sugar Creek Hollow, and our theme this week is Fairy Tales or Nursery Rhymes. We would like to see you alter something in a Vintage or Shabby Chic style!
This week we are being sponsored by
Button2
The Design Team each got to choose one of the fabby digital stamps to play with.  I chose the
Waiting for My Prince.
Here is my card.
I used Gimp to color in my image.  I decided to add "Stone" to the right and left sides and bottom of the digi image.  I used my Art Glitter Designer Glue & the fine tip applicator to add the following Glitters: Just peachy to the dress, Pink Cadillac to the flowers,  Cavalado to the leaves, Key Lime to the vines and Summer sea to the headpiece.
I used some fabulous Ribbon and other goodies from Really Reasonable Ribbon.  Above you can see the coral seam binding, the watermelon baker's twine, moss green leaves, and candies (pink with little gold stars).  Below you can see the Green Curly ribbon that I added to a button. 
Here you can see the fabby Plaid paper from the Wild Roses digi paper pack from Gecko Galz.  
I hope you enjoyed my card, and that you have to play along and link up to
Sugar Creek Hollow
Thank you for visiting!!
Hugs!!
Heather


Wednesday, March 27, 2013

Darling Easter Middy Bag album


Hello Friends!!
Happy Wednesday!!
Today I would like to share with you a tutorial on how to make a mini tag album with the Middy Bitty bags from 
Really Reasonable Ribbon.
Pin It!
To see the actual tutorial, you  can visit my RRR blog post here.
I started out using just one Middy Bitty Bag, and my Peachy Keen Lattice Background stamp.
The Darling little image is from Gecko Galz  Peeps and Hops ephemera collection, and the fabby plaid paper is from Gecko Galz Digital Paper pack:  Wild Roses.  The Easter Blessing Text boxes are from my Easter Blessings Collage Sheet.  
Between the photo above and the one below, you will see that I used the new watermelon baker's twine, as well as my Favs Juliet lace and moss green leaves  from Really Reasonable Ribbon.  I also used the Pink Diamond ribbon and pink candies (with little gold foil stars...love them), from RRR.
I used the scor tape to adhere digital paper to the album and used the Candi fix it foam pads with the Candies and to elevate my text boxes and Gecko Galz image.  I also used my Art Glitter Designer Glue with Fine Tip Applicator to apply glue to the pink lines of the plaid paper.  I then added the Just peachy glitter!  I LOVE it!
Hope you enjoyed my short post today!  LOL
I do want to share that my BFF Ginny has joined another Challenge Design Team called Let's Get Shabby.   I thought I would go and support her by playing along  in this week's challenge.  
Let's Get Shabby:  Challenge 44
You will have to go and check it out to pick what you use in your creation.  You chose one from each list.  I am using 
List 1:  Rabbit
List 2:  Ribbons, buttons, lace and string
List 3:  Stamping and inking

The sun is finally out here in Michigan!!  
Thank you for visiting!!
Hope you have a sunshine filled day!!
Hugs
Heather

Saturday, March 23, 2013

Week 54 Sugar Creek Hollow Altered State


Hello Friends!!
Happy Saturday!!
It is week 54 at Sugar Creek Hollow, and our theme this week is an "Altered State." We would like to see you alter something in a Vintage or Shabby Chic style!
I decided to alter a couple CD's that were scratched.
Pin It!
I started out with a few pieces of  Core'dinations colorcore cardstock in pink, bluegreen,  greenblue and light pink and green.

  I used Ranger's Vintage Photo distress ink on all my edges, and pop dots to elevate my layers.  The Rose on the front is one that I painted a while back in GIMP.  I created it into a die cut.  I used some of my favorite Moss green leaves, white crochet lace, pink swirls ribbon and cotton candy & teal baker's twine from Really Reasonable Ribbon.
I used a couple Spellbinders dies, and a couple cuttlebug and sizzix embossing folders.  The stamping was done with the stamps that I made myself.
I used my crop o dile to punch holes in the sides and tied this little treasure together with some light aqua seam binding from Really Reasonable Ribbon.
We have a Guest Designer this week at Sugar Creek Hollow!
Sandy
She has the most adorable altered piece!!
Please give her a visit and leave her some love!

I can't wait to see what you create for our challenge.

See you at 
Sugar Creek Hollow!

I will be playing along with:
The Craft Room Challenge:  Anything but a card
The Shabby Tea Room:  Anything Goes
Make it Monday:  Anything GoesThank you for visiting!!
Hugs!!
Heather

Thursday, March 21, 2013

My Core’dinations Creative Frenzy Tutorial


My Core'dinations Frenzy Mini Album Tutorial
.
I just love how it turned out, It looks like an old vintage book.
The base of the album was made with the Little Bitty Bags.  I used 4 bags for this album, which creates 8 side pockets and 3 top pockets. 
You can watch my tutorial here on the basic paper bag mini album using bags from Really Reasonable Ribbon.   I have done the same thing here, just a different size bag, and in the video you can see how I used the Core'dinations cardstock to make a pretty binder for another paper bag album.  So just use the measurements below for this album.
 
Fold bags in half and trim the ends opposite the fold (you can do them at the same time) to measure 3.25"
The fold will serve as the pocket back and you will now have two openings per bag for tags.
I used Ranger's Vintage Photo (RVP) to ink all the inner fold creases and edges of bags.
I used Score Tape to attach my bags together and to the cover.  
Please see the video above for placement of Score tape (remember not to put tape across the top, because tags will be going in there.  Try to keep score tape close to the sides, so that the top tags will fit in).
Measure and Cut Cardstock cover 5.25" (tall) by 7.5" (length).  Score (length) at 3.5" and 4".
This will give you a 3.5'' front cover .5" binder and 3.5" back cover.
I used a texture plate from sizzex to Emboss.  
I did the cover and binder together, and then the back. 
I used a Perfect medium pad and applied it to the raised areas of the cover, applied Gold embossing powder (a la mode gold) and heat set  it.  Using my Crop-O-Dile I punched two holes in my binder.
(I used the large hole punch and instead of measuring I just had it go as far as it reached, easy peasy).

Using Stazon Jet black Ink, I stamped my flowers onto my Melon silk ribbon, and then inked it with Ranger's Vintage Photo distress ink (RVP).
Next I cut out 8 pieces of Core'dinations Cardstock
3 and 1/8th" wide by 5" tall.  I embossed them, sanded them and inked them with RVP.  
I used Scor tape to adhere them to the bags.
The cardstock pieces will go on the inside of your bags.  You can see that I did not place them right in the fold or the book would not close.
Next I cut out 8 pieces of Core'dination Cardstock
for the side pocket tags.  They measure 3.5"wide by 4.75" tall.
I used different Embossing folders for the tags, sanded them and inked them with RVP   Then I used a Martha Stewart lace punch for the edges that peak out from the pockets.
Cut three pieces of Core'dinations Cardstock  2" wide by 5" tall.  This time I used some embossing folders to just emboss either the top or bottom edge.  
I also punched the top edge with the same punch.  I used Stazon jet black ink and some stamps I made to stamp on the tags.  Then I used RVP distress ink on the edges.
I used my Crop-O-Dile to punch holes in the top of my three top tags.  Then I used the pink chevron and blue striped ribbons from RRR.  Yes, I inked them with RVP.

Next I used a scallop circle die to cut out 8 Black Corde'nations mats for photos.  I simply sanded these, and adhered them directly to the page with scor tape.  I didn't want my book to get to chunky.

I also used a label die to cut out 8 labels, which I embossed, sanded and inked with Ranger's distress inks.  I tied them with Brown Sugar Baker's Twine.
The Cover
I used some green, light teal, dark teal, ivory and pink Core'dinatons cardstocks from the CARD SIzzix PACK and dies to cut out the bird, leaves, swirls, flowers and frames.  I embossed the leaves, and ivory piece.  
Sanded all pieces, inked all pieces with Vintage photo and I used Perfect Medium and Utee on the bird, flower, ivory oval, and pink and teal frames.  I used Pop dots under the bird, pink frame and ivory oval.  Finished off the cover by adding the Juliet Lace and my favorite Moss leaves from Really Reasonable Ribbon and some champagne flatback pearls.  Use the Perfect medium pad on your pieces after you have sanded and inked them.  Then you pour on the Utee crystals like you would glitter, tap off excess.  Then heat with your heat gun.  
Here are a couple photos of items I used.
and some more
Few more embossing folders and punch.
Ink pads
There are some things I forgot to get photos of..sorry.  But feel free to send me an email if you have a question.
You can see the finished project here.

Thank you so much for taking the time to visit me today!
I hope you have been inspired to treat yourself to some 
Core'dinations Cardstock and start Creating!!

I will be sharing with
Make it Monday:  Anything goes!!
Hugs!!
Heather

My Core’dinations Creative Frenzy

Hello Friends!!

The other day I was looking for a piece of cardstock to use with a card I was making when I came across a couple pieces of Core'dinations Tim Holtz Adirondack  ColorCore stock that I had purchased from my local scrapbook store before it closed.  Next thing you know I was online searching for Core'dinations and came across their website and blog.  Imagine my surprise and excitement!!.... when I saw that they were holding a Design Team Call (how could I have missed them out in blog land I ask you???).
 So Tuesday morning after I got the kiddos off to school, I ran out to my local Joanns and was able to purchase some Tim Holtz Distressed Cardstock,  Tim Holtz Kraft Core Nostalgic Core'dinations cardstock,  and  Tim Holtz Nostalgic Sizzix pack collections
Hence....
I will warn you, this is a long post, so grab your favorite beverage and a snack!  I also did a tutorial for my First Project, you can see it in this blog post here (just imagine how long this post would of been with the tutorial in it...sorry I didn't have time for a video),

You know how I love to alter and create my own digital images...and what would go better with them than CORE'DINATIONS ColorCore Cardstock???  
I feel I would be a good fit for the DT because I love that Core'dinations card stock comes in beautiful colors, textures and sizes. It is like starting out with a "Beautiful blank Canvas."  I love to alter things, and love that I can use this cardstock and make it what ever style I want.  I would really enjoy playing with it and sharing new ideas and techniques with you!  I think my strengths are Card making, journals and  making unique creations.  I love doing tutorials, I feel I am good at taking something that looks challenging and making it look easy.  I can do layouts, but getting good photos of teenage boys is not that easy...lol.   

First Project
First up is a paperbag mini album.
I just love how it turned out, It looks like an old vintage book.
(all details of what was used is in my tutorial here).
Pin It!
I used pieces of Core'dinations cardstock from the Tim Holtz Kraft Core Nostalgic, Tim Holtz Distress and Tim Holtz /Sizzix pack collections on all of my projects (that is the only cardstock in this project).  I LOVE it!
All kinds of yummy colors and texture!
I used one of my hand carved stamps on the silk ribbon from
Really Reasonable Ribbon.
The techniques I used through out this album are:  sanding, embossing (wet and dry) and distressing.  I used Utee on the frames, bird amd flower.  I used Gold embossing powder on the book cover.  I feel it gives it an "old rich feel."
Now to the inside, no photos yet, waiting for Easter dinner, figure I will have a chance to get some great photos of the family.

I love using the circles as mats, I starting sanding them when I realized they would be covered with photos...lol. You will notice that there are three pockets for top tags, and 8 pockets for side tags.  You can see this in the tutorial.
I love how the brown looks like old leather.
Last set of pages.  I will add some embellies after I add the photos!
You can see all the side tags peeking out the side pockets.  I used a Martha Stewart punch.
On to the tags!
I used many cuttlebug and sizzix dies and embossing folders on the Core'dinations card stock!  All stamps through out are ones that I drew and carved myself.
I used some of the edges embossing folders, you can see them above.  You can tell in the photo on the left the sanding and inking with vintage photo.
One more set.
The blue and kraft core is my fav color combo!!
Now a look at the top tags...only three :0)
Again, I used some ribbons from RRR, and I have them listed in the tutorial.
Now a look at the back of the album.
I just love holding this little book.

Project Two
Spring Sparkles Easel Card.
I used some Pink Core'dinations card stock, which I embossed and then sanded.  I used a darker pink Core'dinations cardstock and used a scallop die that was slightly larger than the Digital image I created in GIMP (GIMP tutorials here) using images from Gecko Galz!  I used pop dots to elevate my image from the circle die.  
Close up of the bottom.  I love the pink/blue/green Core'dination combo!  Gorgeous!!
I have some of my favorite Moss green leaves and teal baker's twine from RRR.

Project Three
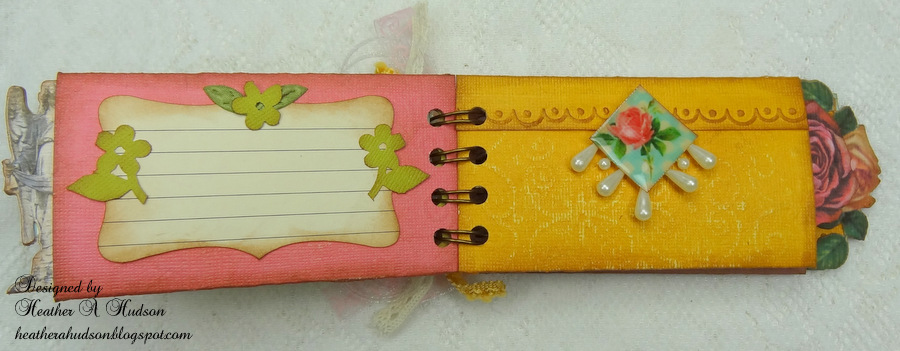
Faux Toilet Paper Spring Mini album
This time I used  Green, yellow, pink and lavender Core'dinations color core cardstocks.  I embossed, sanded and inked them with Ranger's Vintage photo.  I thought I would just create my own "Toilet Paper Rolls" out of cardstock..LOL.  I am glad I did, because the ended up looking like little vintage clutch purses.
The little images that I used as "Fancy buttons" on my purses are from a collage sheet that I created.  I added some UTEE to them, so they look really Fab!  Drop pearls dresses it up...but I wanted to keep embellies to a minimum..because the cardstock is so lovely! I also used the Yellow Pom Pom trimPink Swirls ribbonlight green sparkling ribbon and natural crochet lace to accent my album.
I used my Black Cat Cougar to cut out my tags and die cuts that I created using GIMP and Inkscape.  There is a butterfly, Garden Statue, red rose and yellow rose tags.  Images were from the graphic fairy.
I used a Martha Stewart punch for all the little flowers that are on the journal spots, which I designed in inkscape and cut out with my 
Black Cat Cougar Digital Cutter(I call her Miss. Vintage).
My hubby says this project is his favorite :0)  Here is the last page.
Now the yummy Vintage tags!
The fronts are slightly different than the backs.
I just love them!
The Core'dinations color core cardstocks really make this album dreamy!
 Thank you so much for taking the time to visit me today!
I hope you have been inspired to treat yourself to some 
Core'dinations Cardstock and start Creating!!

I will be sharing with
The Shabby Tea Room:  Anything Goes
Make it Monday: Anything goes!!
Hugs!!
Heather