Sunday, December 05, 2010

Mary Englebreit meets Heather A Hudson

Okay..so my Mojo...is still working.  
So..here is my take on the
Challenge.
Growing up...my Dear Mother loved Mary Engelbreit.  I can remember when I first started painting...her style is what I chose.  I painted all of my mom's light switch plate covers...a peg rack...and a lot of other things...all with my Favorite Pink Mary Engelbreit Posey.
That was before I knew how to shade and highlight...which really the stuff I was painting didn't need that.  So here is my take on one of the "Super Stars" of my Youth...Mary Engelbeit.  
With a Heather A. Hudson twist...lol
The twist is pretty much that the whole thing has been distressed.  I am not into "Bright Colors"
Here is a close up of the lower left.
I remember that was my Fav sentiment...Live..Love...Laugh!
This is it for those of you who are just visiting to see my take on the challenge. 
 If you are interested in seeing how this card came to be...please read on.
First I drew out the posey...you will see here..my plan is to make some ornies later...if I have some time.  I used the craft foam sheets that you can get at craft stores...I got mine at the Dollar Store.  I simply laid the picture over the foam...and then traced over the drawing.  This leaves an indentation...on the foam.  Usually I go back over the indentations again...with out the paper.  Don't use a pen...because the ink will make your stamping "dirty" looking.  I normally use my painting stylus.  Here is a close up of the leaf.
You can see the indentations.  Next step is to cut out the leaf shape.  Below you can see the three pieces cut out.  I decided to add some free hand little circles in the flower itself...just to add a little extra touch.
I used light weight pink value card stock from Joanns...and green too.  I used Ranger's Peeled paint for the leaf...and Fire brick red for the posey.  
Here you can see how the foam looks with the ink on it..and how the stamps turned out.  I will end up scanning the shapes into my Robo Master program...so I can just have it cut out my pieces in the future...here I cut them out by hand.

Here you can see how I used one leaf stamp on green paper..and one on beige.  All edges were inked with Ranger's Vintage photo.  I ended up using the beige leaf...because it fits my decor better.  Someone else may like the darker better.
I used my Crop O Dile to add a grommet.
I added one of my fav leaf trims...and of course some vintage looking lace.  The paper was a cheap polka dot...that had "Bright White" dots...I just inked the whole thing...with vintage photo..so now it is perfect.  I added one of my Fav antique buttons and gold beading wire.  I also used this gold beading wire for the hanger at the top of the tag / ornie.  The wire is by Darice and is 24 gauge...which is really easy to twist and manipulate.
I just hand wrote the words...and inked them with worn lipstick...and vintage photo.  Hot glue holds the buttons in place.
I hope you might of learned something new...that you might want to try out.  Have a great day!
Thanks for visiting!
Hugs!


I am listening to Christmas Music..and my Christmas Mojo is kicking in.  I have a lot to do today (and who doesn't).  I decided to start my morning working on one of the challenges from 
This one is for Day 276 Ephemera.  I couldn't tell you how many times I need to look up how to spell that word...lol.  I always have an extra "r" in there.  So below is my take on this challenge.
A few Close ups
The upper Right
I had a very nice relaxing time creating my card.  For those of you who don't mind reading on...you can see how this card came to be.
Here are some photos of the page I created in ROBO MASTER, the program I am currently using for my Silhouette SD (since the new program doesn't have the "find an outline feature)."
I just browse the internet...and find vintage Ephemera (wow spelled it right the first time).  I create an outline for them in Robo Master.  I always adjust nodes....so that the cut time is not as long (removing nodes...and reconfiguring points...etc).  The lovely thing about the Silhouette...is the great "Registration Marks" that you can use...so your Silhouette Machine will read these "registration marks" (pretty much a fancy plotter)...and will know where to cut out!  Below is a photo of my page printed..and loaded into the Silhouette SD.
Just a note....I pretty much always have my machine cut my items twice...so there is no messing around with popping them out of the paper.  I do this by selecting the item...(make sure your image is not grouped with it's outline)...I copy and paste my "outline."  You will know that your machine will cut the item 2 times...when you outline color is "green"..showing it has been copied.  Now you will want to go back and group your image with the outlines.  Otherwise you will move it...and something will not follow...and you will have to do it again (experience here..lol).
So how cool is this!  Walk away...get some coffee...or in my case I am on to Diet Cherry Pepsi now...lol.  Here is what the sheet looks like when it is done cutting.
Since it cut twice (it is thin cardstock)..it pops out easy.  I like easy.
Kind of hard to see...but these outlines will be cut..just like on the Cricut...nothing has to be printed...and you just place your items on the page where you want them...and the Silhouette will cut them out.
Again...I did the cut twice...saves on time.
This is what you get.
Somehow I forgot the printed banner in this photo...so just pretend it is there..lol
I stamped using an Inkadinkado stamp...with Ranger's Distress ink in Peeled Paint...and then every thing was distressed with Vintage photo (meaning I inked the edges...and wadded up the ephemera). 
Took me a while to figure out where I wanted to place things.  If I were to make this card again (which I will)..I will decrease the size of the ephemera..So I can easily fit everything..with out having to cover up anything.
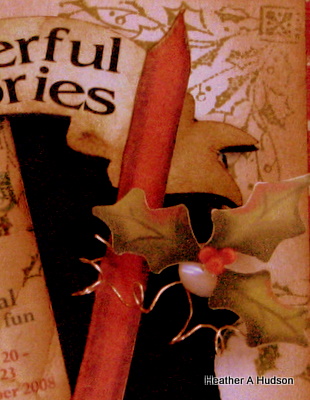
I didn't use the ticket on the front...I put it on the inside...along with a border of Christmas Holly...like I used on my 
The Christmas Holly is one of the die cuts I created by first drawing it...and then painting it in GIMP (free online editing program)..and then cut out on my Silhouette SD.
One last shot of the finished Card.
Thanks for visiting!  Hope this inspires you to let your creativity come out and play!
Hugs!

Saturday, December 04, 2010

Swirlydoos 25 Days of Christmas Tags Day 4

Here is my quick tag I designed for the 
You needed to include an image of a Reindeer.
I used Die Cuts that I painted in GIMP
and the Reindeer came from the
Silhouette Online Store
Thanks for visiting!
Hugs!