Tuesday, March 29, 2011

Sylish Blogger Award

**Thanks for voting at my BF's Blog...Yay!** 

One of my Fellow Bella Beauties Julie awarded me with the
"Stylish blogger Award" on March 15th.  I had decided at that time that I wanted to create a new blog back ground....so I wanted to wait to post this award until I had my new blog background in use.
So Super Thank you and Hugs Julie!  You are so Sweet!
Now, I am supposed to tell you 7 things about myself that you may not already know.
Here are my 7 things
  1. After I passed my Nclex exam for Nursing, I was not sure that I wanted to work as a RN.  So I worked with this guy restoring houses in Historic Depot town.  The pay stunk, and the work was hard..but I learned some fun stuff.    I scraped paint off houses while bee's buzzed around my head and I was up 2 or 3 floors on a ladder...so...fear of heights...not so much now.  Did you know..it is super easy going up the ladder and getting up on a roof.  Coming down...FREAKY!
  2. My basement is like a crafter's warehouse.  Those who know me...kid about shopping in my basement.  Sadly...they could.
  3. I tiled all the bathrooms (floors, showers, tub surrounds) in my house.  I used 4 inch tiles.  Plain white...so I could change the decor...and it should be okay with the tile.  I did beige in the Master bath.  I didn't want to pay to have it done...because it seemed similar to quilting.  Cleaning the  extra grout after grouting...I was not so good at...LOL.  Not a job I would want...hard labor!
  4. My favorite drink is DIET CHERRY PEPSI.  I always have my own two liter with me. Diet Cherry Dr. Pepper..will do..if no DCP.
  5. I am trying to stick to a budget.  I have been "Spend Free" (on stuff for myself) for 1 week.  WOOT! WOOT!  Although I did just pay my Swirlydoos April kit...but that shouldn't count right?
  6. I have recently been watching Clean House.  I am trying to get rid of things...and get my house organized.  You girls would "Gasp" at the area I work in. That is how I work out you know..climbing over piles of paper...LOL.
  7. Recently I started going to church again.  Honestly it makes me a Better person (to be around) Puts everything into perspective and reminds me of what really is important (who cares if people like your stuff)  I just need to find a "Refresh" button, because by Thursday...I need someone to remind me.  I am thinking of creating a journal to take notes ...and then re-read them.
There are 7 things you might not of known, or didn't want to know, and now you do.  Now I just need to nominate some blogs that I have newly come across to share with you ( you know I got all kinds of peeps that I love to follow...and you should check them all out too).


1.  Anna Marie  She does beautiful layouts of her children!  Great Photos!  So check out her blog!  
2.  ShoreGirl  We have lots in common!  She love to find items that need some love...and makes them beautiful!  One of my Fav things to do....so check her out!  
3.  Best Friend Ginny  Ginny opened a Scrapbook store and has a business blog.  You can find inspiration there!  I don't expect her to put the award on her blog...or links...because it is a business blog...but still wanted you girls to check it out!
4.  Maggi's Blog  Maggi does beautiful work!  We play in many of the same sandboxes...LOL.  So check her out!


That is all I am going to list today...I will post the rest tomorrow.  I got too many "Too dos ...to do"...lol.
Thanks for visiting!
Hugs!


Sunday, March 27, 2011

Love: Swirlydoos March Kit

Our Girl Peggy over at Swirlydoos decided to have a challenge
I just couldn't resist!  Strictly Homemade.  Meaning we could really use any store bought flowers...unless they were used as flower centers.  So since I had my paints out from that gorgeous
Painted layout I did last week...I thought...why not do a little more.
So here is the main sheet I used, it is Prima Paper...and I LOVE it!
You can see where I used my Kraft knife to cut out around the chic..and at the top and right side.  That was so I was able to cut out another square shape to set on point.  This too is from the Fabulous March Swirlydoos kit.  Notice it is lined...which will be great when I decide what I want to say in my journaling.
The first thing I did for my home made...I used a Martha Stewart punch and painted it.  If you like to paint, the colors I used are Forest green and Mulberry acrylics by Delta.  I used a 1/2 inch Lowell 7000 series brush to do the leaves and petals.  I used a size 1 liner brush for the veins.
Next I used Ranger ink in Vintage photo after I distressed all my page edges.  I also used my own favorite background stamp (which I drew and carved myself) with Ranger's Chipped China (looks a little greenish on the paper...due to the yellow hues in the paper..which was PERFECT).
Some of you will be thinking...hmmm...this kind of reminds me of something...what could it be?  Here is what you are thinking...lol
The Dusty Attic March Sketch, here is the sketch below.
Isn't it beautiful!  So you might be able to see this in my layout.  I just changed it a little...lol.  But I feel pretty good about how it turned out.  I used my Angle brush and the mulberry paint to shade on the beautiful ladies dress, hair and flowers.
That really made the dress "pop."  I even gave her a little eye shadow..lol.  I used my Tim Holtz flower die and cut these out.  I used the same mulberry paint, and painted all the edges.
I got a little tired of taking photos...so it is finished now...lol.  Took too much time getting up and down...lol.  This is a picture of my parents when they re-newed their Wedding vows.
I accidentally dropped my brush (which is common)..so I got to get some matching paint ..because it looks like she did a bad job putting on lipstick (the paper chic).  Here are some close ups of the details.
That gold stuff....that is dusty attic scraps!  It is the left over pieces from the "Corner pieces" that I used.  I just cut them to create this faux frame on the side.  I embossed them with gold embossing powders and then glued down glass seed beads along all the edges.  This way they should count in Peggy's challenge.  The swirls were cut using the Tim Holtz die, and using a darker purple paper from the kit, and I just used Lisa Pink by Delta to do some hi lighting.
Above the glass seed beads show up pretty well on the dusty attic pieces.  You can also see the leaves that I cut out free hand and painted.  I also used a #2 filbert brush (lowell cornell 7000 series) to paint the little leaves through out my flowers.  Some of the flowers were punched out individually with a fiskars punch, and painted.  I used stickles in Mairgold for these flowers.  I used gems for the centers of the flower borders I did with the Martha Stewart punch.
I added antique buttons (I would almost say I do that with all my projects) with gold beading wire and beads to the flower centers.  I used beading wire and a few beads to create the necklace.  I also used a perfect medium pen and drew around a few of the flowers and dusted with perfect pearls in perfect copper.  The shading on the dress shows up really great here.  
I matted the photo with some of the darker prima paper from the kit, distress it and inked in vintage photo.  I made my title with left over strips, that I just had wrote "love" on, distressed and curled.  The leaves and flower center show up pretty good here.  Oops...almost forgot...I used one of the mists by Ranger that came in my Swirlydoos kit.  It is a light blue color!  I will post it later.
I sure hope I got it all down...LOL.  
Thank you for visiting!
Hugs!


Wednesday, March 23, 2011

March ATC Challenge at Bella Creations

Here is my submission for Helene's Challenge 
this month 
at 
Here are the images provided by LeAnne from Gecko Galz
(she is just too sweet...letting us use these great images).
Okay..so that really isn't my color scheme......but hey...that is why they call it a challenge (of course once I finished my ATC...I changed my mind and now love the background).  I do LOVE this sweet little clown image she provided below.
Is she not the cutest thing ever?
I am pretty proud of myself...because my ATC is Digital.
I altered all the images in GIMP.  You will see a lot of the images
that I have altered from Karen the
I will just post the photos of the ones that I just found today to make my ATC complete.  The rest of her original images can be found in my older posts.
I used GIMP to select one of the wings below.
Look at this cute image below.
First, I used GIMP to get rid of everything and touch up the mushroom.
I then used my Silhouette SD Studio program to flip the original background and girl images (used Gimp to create a transparent page..and get rid of the background around the girl clown)..just to be different.
I added some of my favorite Graphic Fairy Roses and White flowers..and leaves (of course).  Here is what I came up with.
It says....LOL.."Come play with me in my Scrap Shroom"...I thought that was pretty funny.
Since I did use my Silhouette SD, I will be able to cut out all these little details and make them more "textured."  I am so happy with how this turned out.  I believe this is my first ATC that has been made with altered art...and not just painted.  
So...come and join me in my "Scrap Shroom" over at Bellas.
Thanks for visiting!
Hugs!

Mini Album Page for a Friend

Here is a Mini Album
Scrapbook page that I designed for a friend.  I signed up to create a page for this mini album back in December (seems so long ago)...and the due date is April 1st!
I used some graphics from Karen
I used this beautiful moth...I love the colors.
I used this image of the fairy dancing...because Dancing is what I want to do when I get my Swirlydoo's kit.
I know this is an Italian Opera Singer...but she looked just as Beautiful as a Queen would...and that kind of has something to do with my page (don't want to say to much..and have the girly girl know about this...lol).
I used my Silhouette SD to create the shaped page.  We were to have it measure 6in by 6in.  We needed to leave an inch at the left for the book binding.
I used papers from my February Swirlydoo's kit.  I inked the edges of the shaped page with peeled paint distress inks by Ranger.  Same with all the leaves.  The Flowers were spritzed with Ranger's Perfect pearls mist in Perfect Copper.
Here are a few close ups.
I embossed the Dusty Attic piece with olde gold and then used perfect medium again...and brushed on some perfect peals in copper.  I also added some stickles in Marigold.
I used tiny roses for the centers of my flowers, they too were spritzed with Ranger's Perfect pearls in perfect copper.  I used the antique button with beading wire and some glass beads to create the stamen.  Couple little gems on the side...and it turned out really pretty I think.
Here is the back side.
I did the same techniques on this side.  I also added some perfect pearls to all the leaves.  I will be adding some stickles to the base of the flowers on this side (Just to finish them off).  Here I cut out two green ribbon roses from some trim (one of my favs).  I used a Timmy pin with some beads...and a cute little heart charm.  I did create a tag that slides in behind the photo/background.
The bookmard I created with the Dress Form stamp I made (with my Teresa Collins stamp maker).  On the back is a sweet little message.
Thanks for visiting!
Enjoy your day!
Hugs!

Monday, March 21, 2011

My Layout for my BF's Store using Jenni Bowlin Products

***If you are visiting from the Graphic Fairy the freebie Frame image is located at the bottom of this post.***


I purchased these Fab Jenni Bowlin papers to create this beautiful layout for a Jenni Bowlin Challenge that my BF is having on her blog.  
I can win a $10 gift certificate if I get enough votes....so if you are not busy....drop by her blog and post a comment saying you vote for Heather (me...LOL).  You can vote until March 28th.  Here is a direct link to the post
Place your vote here :-)
At the end of this post I have a Vintage Thank you image for those of you who took the time for vote for me!  Hugs!
Here are some photos of this piece in the making
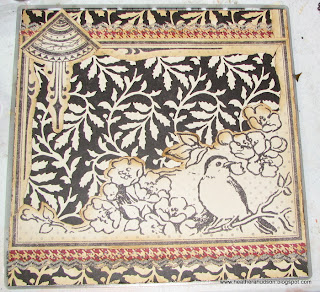
Above are photos (stock photos) of the original papers.
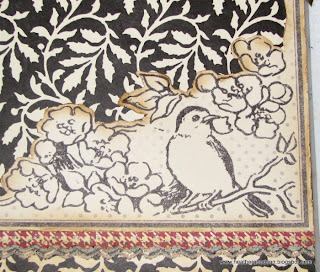
I did some fussy cutting of the bird paper.  I cut out part of the side lengths, and repositioned the upper right corner piece so it was pointing downward.  I then placed it on top of the black paper.  I cut out one inch strips of the red hounds-tooth paper.  I distressed all edges using my cutterbee scissors, and Ranger's distress ink in Vintage photo.
I used one of my punches to punch out the edges of the red paper.  I layered it with vintage lace and the black/khaki background.  Here you can see the bird and flowers before I painted them.  The black background has not had the perfect pearls added yet either.
Here I started painting the leaves with forest green acrylics by Delta.

I started painting the flowers with Santa Red by Decoart.
I painted the bluebird with Delta's Norsk blue, the branches with Spice brown, and the centers of the flowers with Antique Gold.  I used an angle shader by Lowell Cornell (7000 series), to shade all of my painting, to give it a water color effect and didn't want to cover the whole image.  I also used a #2 Filbert brush to paint some extra leaves on the background.  I also used this brush to paint leaves on the borders, and the circle piece that I added to the center circle (below).
I stamped the part of the circle that I know will show with a stamp I designed and carved using Vintage photo.  I then painted the leaves over the top with forest green.
I added some decorator's trim from Joannes at the bottom of the page.  I guess I did all the work with the lace and punched paper....for nothing...lol.  That is what happens when you change your mind about something.  I knew once I saw that green ribbon...it would be going at the bottom of the page.
Here is the center circle in place.  I used lace behind the circle.  Here you can see that I painted some more green leaves on the sides...and the "Remember" acrylic piece by Heidi Swapp.
I just place some plane beige paper behind this Heidi Swapp piece.  Then inked it.  :-)  added the leaves.
Here is a close up the top right in progress.  I have that sweet little Heidi Swap Crown on my blue bird.
I used my Perfect Medium pen to draw inside of the khaki color designs on the black background, then applied perfect pearls in perfect bronze.
I inked the edges of the large Red Heidi Swap flowers with Ranger's Chipped Sapphire distress ink and then folded in half, and tucked under the "Remember" piece (which is elevated with pop dots). I then used Stickles in marigold to form a "center".  I used beading wire in gold and added some beads to add some cool flower stamens.
You can see the Tim Holtz pin that I added a blue bead and some clear beads too.  A cross charm, and some red butterflies.  The butterflies are Heidi Swap clear acrylic with a black herringbone pattern.  I just simply painted the backs of all 4 of them with Santa Red paint.  Then used my perfect medium pen and perfect pearls in perfect bronze on the front.
Here you can see more of the butterflies.  Look at that beautiful Dusty Attic piece in the Right corner.  I used perfect medium on this and then embossed it with Old Gold embossing powder.  I added some small crystal bling to the Dusty Attics too.  The Prima white flower was spritzed with Heirloom gold perfect pearls mist...same with the small flowers to it's side.
The small pink and white flowers were created with my fiskar's tiny flower punch.  I created them out of khaki cardstock and then shaded with the Santa red paint.  I used stickles in marigold for the centers.
Here is a close up of the crown on the bird which I applied the Perfect pearls.  I added the sweet flower charm in the center and added some more painted leaves.  There are some more of the tiny flowers I painted.
Here you can see the larger red butterfly, and I forgot to mention that I did a layer of Lisa pink paint (Delta) on the blue bird's chest and then another layer of Santa Red.  I also outlined the bird in perfect pearls
The pictures of my and my DH's parents were all cut out using my Silhouette SD (print and cut feature), at 2 inches.  I used black card stock for matting which was cut out using the "off set feature" of my Silhouette Studio program.
One last look at the finished piece.
Here is my Thank you Image
(I created this using graphic from Karen the Graphic Fairy)

If you double click, you will get the large image. Then you can right click and save.
This is a GIF file with a transparent background.  I have a .jpg file if you need it instead.  Just leave a comment.
Hugs!
Here is a jpg of the above transparent background image.
Thanks!
Hugs!

Here are a few cards that I have created using images

If you would like to see the step by step tutorial, please see this

Here is a Valentine's Card I created for Sandi that I used images from the Graphic Fairy.
Too see more photos of this card please visit this 

I was featured at 
for this card I created also using images that I edited from
the Graphic Fairy.
I also created the card below for another challenge at 
365 Cards the same week.
You can see the original image that I used from the 
Graphics Fairy here at this 
I also created this fun Collage using more of Karen's images.
You can see more photos here

I also created this card below, it is a shaped flower card
using Karen's graphics.  I again used Gimp to alter them.  It is currently out for publication
This is one of my Favorite cards.  Please check out 
to see pictures and you can 
check out this
(photos will be back in April)
My most current project (above) using Karen's images is my blog backgroud.  Please visit the post below to see the original images 
that I altered to use for my background.

Thank you so much for visiting!
Hugs!